Showing posts with label wristlet. Show all posts

Tuesday, July 31, 2012

Rectangular Wonky Stars

This tiny block was an experiment with making a rectangular wonky star block.  Instead of beginning with squares, as in regular wonky stars, which are a super fun block to make, I began with itty bitty rectangles.  They work out just the same, except you have to be careful to which side of the rectangle you add the star points.  I put an adorable Japanese fabric fussy cut in the center of the rectangle.  The block finishes at 1 7/8 x 2 1/4 inches.
I set my miniature block into the front of a Perfect Zip Bag (pattern by Elizabeth Hartman) via reverse applique and added some hand stitched details.  The outside of the bag is black yarn dyed essex which has incredible texture and at the same time is super soft.  Thanks to Rachel for sending me some!  I hope I can find more somewhere soon.  Love this stuff.

 The lining of the bag is oval elements in a great dark purple and plum.

I enjoyed making my first block so much I made another.  This on is slightly bigger and pieced into the front of a cell phone case.  I think I prefer the reverse applique setting, but this one is sweet too.
 They make a cute pair; I think I'll keep them.

Friday, April 20, 2012

Teacher Gifts

It's that time of year again.  My go to gift these days is ruffled wristlets, using my simple tutorial.  And yes, I do have to go back read my own instructions every time.  Now that my older son is in elementary school, there are so many teachers to thank.  He has one for Spanish, one for Music, one for Art, and so on.  These are a quick and inexpensive way to give handmade thank you gifts to each person who has taught him this past year.
I spotted Shea making some of these at the retreat, and she was kind enough to share a great tip with me.  When you go to gather the ruffle, run a basting stitch down both sides of the strip instead of a single line down the middle.  This will make gathering the strip so much easier, and it will stay nice and straight for you, instead of twisting up.  It also makes the basting stitches easy to remove after you've sewn the ruffle to the wristlet.  Thanks for the super tip, Shea!
And as you may have noticed, my backdrop here is my Flashdance baby quilt.  I had it out after washing and drying it and listing in my shop.  I also listed the doll sized quilt too.
 Okay, now I have more wristlets to make!

Saturday, December 17, 2011

New and Improved Ruffled Wristlets

I made my first ruffled wristlets and tutorial over a year ago, and they have been handy gifts for family, teachers, etc.  I made several more this Christmas, and I came up with some improvements to the pattern.  For starters, I'm hosting the new tutorial on google documents, which may be easier for some to access than scribd.  It's certainly easier for me to upload that way.  You can find it here:
New Ruffled Wristlets Tutorial
The new construction technique is what I'm most excited to share with you.  I've finished the circle of the wristlet completely, so there are no raw edges.  I've also created the ruffle from a single strip of fabric, rather than two as in the old tute. Finally, I made the loop larger.  It is easy to slide on and off, even for those with larger hands.  You can even adjust the size of the loop slightly in one of the final steps.
 I hope you like it and find it improved and easy to download.  I'd love to see any wristlets you make!

Monday, November 29, 2010

Handmade Christmas Countdown Begins

26 days until Christmas, and the pace of making Christmas gifts will need to increase to get everything done in time. Yes, I started back in the summer, but there is still a lot to do! I finished up two gifts over the weekend. Both were requests of things I have made before, which is always a good feeling.

First is a camera wristlet. Really it can be used for anything small - a license, keys, lipstick and a credit card, or a phone. It has a Velcro closed main compartment, and a small back pocket which is big enough for a credit card or tickets. The clever part of the design is the interlocking straps which keep the contents secure and make the case easy to hang on your wrist. The pattern is by Keyka Lou, and it is very easy to follow. There are two already made and in my shop, if this looks like just the thing you need for someone on your list!
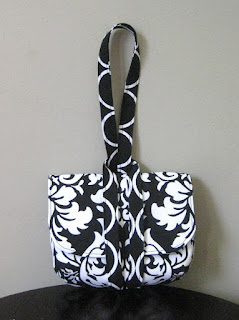
This was a request from my best friend. She has a summery one and requested one to use with dressier clothes. The outer fabric is damask by Michael Miller.
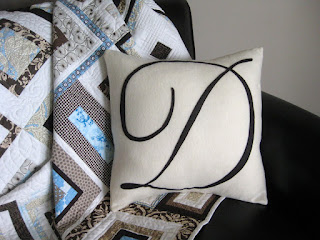
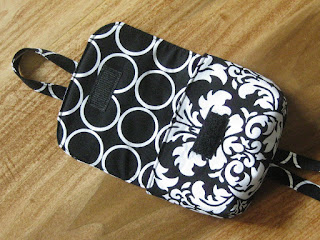
My second finish was a monogram pillow, specially requested for a certain gentleman. I've made a number of these before - the felt makes the applique a snap and they turn out super comfy to use, especially in winter.