
Notepad Cover and Pen Holder Tutorial
1.Cut two rectangles of cover fabric 7 ¼ by 8 1/4
Cut one rectangle InnerFuse* 7 ¼ by 8 ¼ (you will need to trim this 1/8 inch or so on two sides later)
Cut one rectangle for the pocket lining 4 ½ by 8 ¼
Cut one strip for pocket 2 by 8 ¼
Cut one strip for pocket 2 ¾ by 8 ¼
Cut pocket interfacing 4 1/2 by 8 1/4
Cut one rectangle for the flap closure 2 by 7
One inch piece of Velcro, sticky and soft sides

2. All seams are 1/4 inch. Sew the two pocket strips together lengthwise and iron open. Iron the fusible interfacing to the wrong side of this rectangle.
3. Right sides together, sew pocket front and pocket lining together, leaving a 2 gap for turning right side out.

4. Fold the flap closure in half widthwise, right sides together, and sew down two long sides, leaving the short side open for turning right side out.
5. Rights sides together, sew cover fabric rectangles together, leaving one short side completely open.
6. Turn all shapes right side out after clipping corners. Iron.

7. Top stitch along three sides on the closure flap. Sew one piece of Velcro onto the finished short end.

8. Trimming as necessary, slide the InnerFuse piece into the cover fabric rectangle. Turn the raw edges under. Slip raw edge of the closure flap into this end, at the center. Iron the whole rectangle to fuse.
9. Sew the other piece of Velcro onto the front of the cover in the center right side (test for placement by folding the flap over the front as if closing the notepad cover).

10. Pin the pocket piece onto the cover fabric rectangle. Top stitch around the larger rectangle (this attaches the pocket and the flap to it at the same time).

11. Find the center of the long end of the cover. Mark with a pin and stitch ½ on either side of the pin, top to bottom (this will make a pocket for the pen).

12. Slide in your 3 by 5 notepad and pen and enjoy! The pocket to the left of the pen is great for coupons and receipts too!

*InnerFuse is a fusible product that is a lot more heavy weight than regular interfacing. It is almost the weigth of cardstock but a bit thicker. I used the medium weight kind - available at places like Joanns. Using this product makes the notepad holder feel like a book. I tried using interfacing, but even with two layers the holder was just too floppy.
Tutorial for personal, not commercial use. Please let me know what points are unclear or if you have any questions, and I'll revise the tutorial! Enjoy!!
 These plates make me think of a quilt - half square triangles!
 The carving on this piece also makes me think of quilting patterns.
 After my trip, I hope to finish piecing a new, fun baby quilt I've started! See you then.

 And finally, a hostess gift for a party I'm attending tomorrow night. I had another item in mind originally, but once again Krista's cute wall hanging was on my brain. It is 12 x 15 just like hers.

 And look at this stack of gorgeous Anna Maria Horner Little Folks voile! These are destined for my next Christmas gift project. More on that soon.
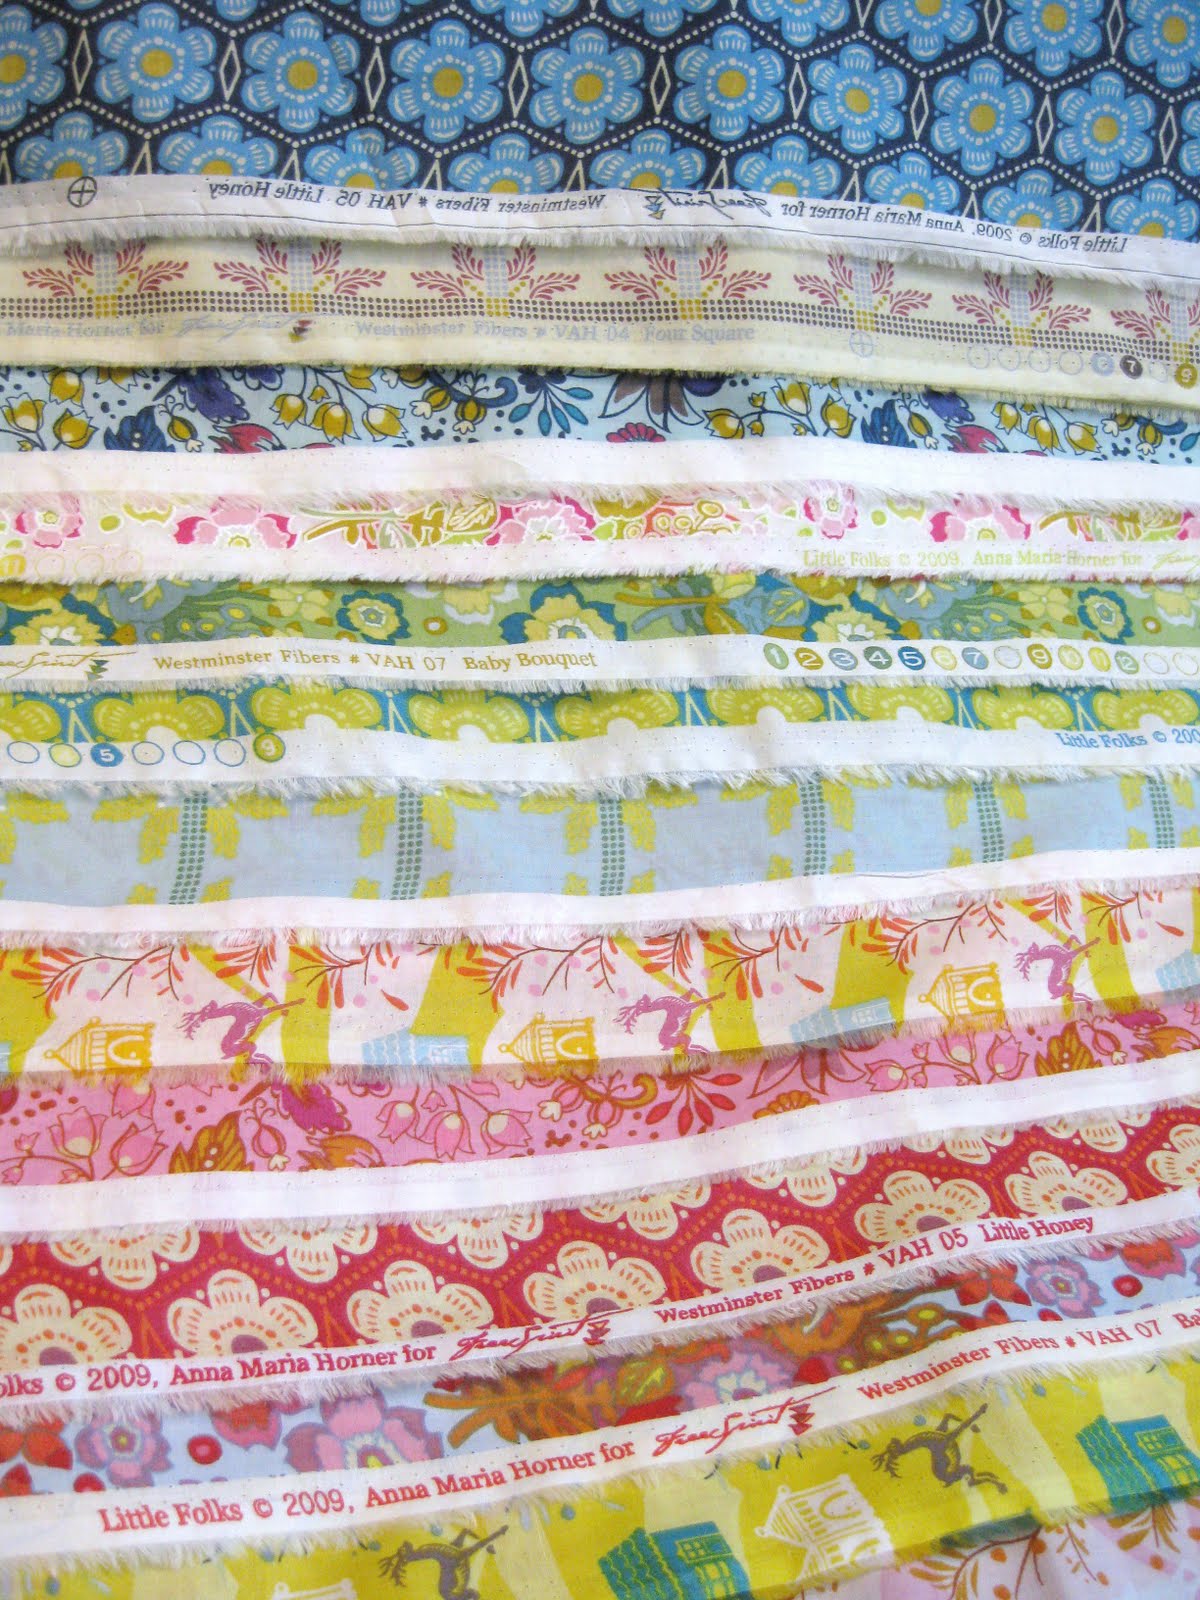

 Fun, fun, fun :).
 Notepad Cover and Pen Holder Tutorial

 The next step is to add straps so your train engineer can wear Thomas. I used peel and stick velcro. I cut four small strips (the prickly side of the velcro) and put them inside the train.
 Then I used the soft side of the velcro for the straps. This way, your straps are completely adjustable. They can be worn straight across the should or crossed in the back. I left the peel away paper intact on the straps.
 When I did a test run on the costume I found it was back heavy. To add ballast (?), I taped a 16oz can onto the inside of Thomas' head. This worked very well, but it did make the costume pretty heavy for my little guy. If I were making it all again, I'd make the back of the train much thinner and forgo the extra piece to cover the seams. Try to make it as light as possible. You might also cut the engineer opening further towards the rear of the first box, rather than in the middle.
 As you can tell the costume turned out to be too large for my 2 year old. These instructions make a train that would better fit a 3-5 year old. If your person is smaller, be sure to start with smaller boxes! Comment with any questions you have about the process, and I'll try to clarify!


 When the paint goes on is when this bunch of cardboard starts looking like Thomas, so stay tuned...