Showing posts with label quilt. Show all posts

Tuesday, February 23, 2021

Modern Quilted Appliqué Pillow

It has been absolutely frigid lately in the Midwest, and when it is that cold I just want to sit under blankets as much as possible. Hand sewing is perfect for such days, so I returned to improv appliqué in my latest project.

The technique of improv appliqué begins, for me, with appliqué shapes cut by hand without a template. I eyeball the shape and trim as necessary to adjust to the contours I want. Then I baste the pieces in place and appliqué with matching thread.


I prefer rather dense quilting on appliqué pieces because it makes them durable. This pillow cover is machine quilted about every quarter of an inch.

The finished pillow cover is 19 x 19 and fits a 20 inch pillow form nice and snuggly. The design is a little mid century modern meets 1970s with the coral, gold, and brown square arcs. You can find the finished quilted pillow cover in my etsy shop.

I'm thinking of attempting to make a how to video on this method of improv appliqué, if anyone is interested.

Monday, October 12, 2020

Three Quarter Log Cabin Scrap Quilt


It is a relief to finish this quilt. Making the improv blocks from scraps was so relaxing last fall, but they sat another year on a shelf as I tried to figure out how to use them all together. The solution of sashing to separate the crazy prints and colors has worked fairly well.

The quilt is big by my standards (73 x 95), since I quilted it on my tiny home machine. I find small scale free motion designs well suited for a large quilt because the small shapes, like these loops, allow you to stop and adjust the quilt frequently without interrupting or marring a larger, flowing design. 


I used an extra wide yellow backing from my stash and an old Erin McMorris Summersault print that I love for the binding. I think largescale prints are so interesting as binding because you get quite a variation along the edge or the quilt.

Patting myself on the back for using these blocks rather than letting them languish, and I hope the quilt will be useful and a blessing to a local child in foster care. 

Saturday, August 15, 2020

Breathing Room

Remember this scrap project from last fall? I made three quarter log cabin blocks with my print scraps, using every shade and pattern. It was fun and therapeutic, but once I completed the blocks, I was dismayed to find I hated how they looked together. I even wrote a post contemplating where I went wrong. After leaving them on the shelf and the mental break of working on other projects, I decided to see if I could rescue the blocks. I do not ordinarily use sashing, but I knew the blocks needed some breathing room.

The fabric I chose for the sashing is Homespun Essex in indigo (although it reads as grey to me), and I think it is just what the blocks needed. The neutral space between the crazy prints tones down the chaos just enough. I picked my favorite 45 blocks, which finish about 9 x 12, so this will be an extra long twin when I get it pieced.


Friday, July 3, 2020

Improv Appliqué Pillow


My latest improv appliqué piece was inspired by dried coral. I wanted to create a shape that mimicked its organic curves, specifically the holes within the coral. The technique I used was the same as my previous improv appliqué pieces (cutting the appliqué shape by eye, basting it a quarter inch from the edges onto the background, and using needle turn to sew it down), with the addition of careful basting around the shapes to be cut out within the larger appliqué shape. I cut the holes one by one as I appliquéd them in order to maintain the structure of the piece and avoid distortion. I'm really pleased with how flat I was able to keep the piece using this strategy.

I had a false start with the quilting, trying out some ocean-like waves which went awry. I set it aside for a while and ignored the impulse to put the whole thing in the trash can. After a couple hours of laborious unstitching, I decided to create a dense, random crosshatch. I love the texture, and the bonus of dense quilting for an appliqué piece in particular is how durable it makes the pillow.

Another change from my original design is the shape of the finished pillow. I started with a square, but I didn't like how the appliqué shape moved across the square. It works so much better as a rectangle, although it hurt a bit to lop off a good 6 inches. It was worth it in the end, as the piece achieves just what I set out to make - a natural, serenely flowing shape.

You can find this unique, quilted pillow in my etsy shop.

Monday, November 11, 2019

Metro Link Quilt 2

Who braved the freezing temps and rushing wind to snap a few photos of her quilt? This girl. The phrase about suffering for the sake art came to mind.

I'm happy with the way the quilt came out, especially the choice of backing and binding. I'd been saving the Habitat print for just the right quilt, and I love it with the bright colors of the scraps on the front.  It was begging for a solid yellow binding.
In typical Kansas City fashion, yesterday was sunny and warm. Can you believe I hand stitched the binding outside on the deck, then this?
This is the Metro Link quilt, pattern by Michelle (@ilikeorangetoo on Instagram). I made another version of the quilt several years ago.

Sunday, October 13, 2019

A New Link

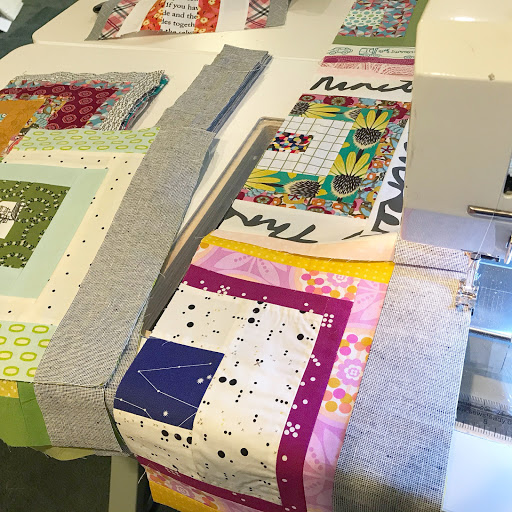
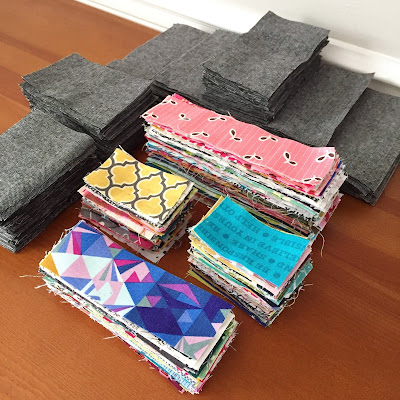
I decided to get back in the scrappy saddle with the start of a new Metro Link quilt. Boy, I had forgotten how many tiny pieces (617!) are in this pattern by Michelle. The smallest ones finish at 1 x 2 inches. Cutting the background pieces from Essex linen yardage was quick, but cutting each individual piece from scraps took the better part of the past week. Whew!

I usually enjoy sewing from scraps improvisationally because it eliminates the need for precision in the initial phases, but I have to admit that there is something very satisfying about all those neat stacks cut to precisely the right size.
I've got the first step of the pattern all lined up for a night of chain piecing. Belying its precision, this type of sewing is actually quite relaxing. Unlike every step of an improv piece, there are no decisions to be made - just methodical, soothing stitches. Sometimes, it's just what you need.

Friday, November 9, 2018

Ketchikan Throw Quilt in Jacquie's Favorite Bundle of Painter's Palette Solids


I am excited to share the quilt I made with Jacquie's Favorites bundle of Painter's Palette Solids from Paint Brush Studio. This post corresponds to a giveaway this weekend over on my Instagram account, so head over if you'd like to enter for a chance to win a kit.

This was my first time working with Painter's Palette fabrics. These solids are so soft without being thin. The weight is just perfect for quilting.

Some of you may recognize this throw quilt as my Ketchikan Quilt pattern. Isn't it cheerful in this rainbow of colors? I used just a few blocks from the pattern and arranged them in a new way to make a smaller version of the quilt.

I chose the darkest blue from the bundle as my background. It is called Marine.


Jacquie Gering designed and made this modern Whirlygig quilt with her bundle. A free pattern can be found for it on Painter Brush Studio's website.
The giveaway for the Whirlygig quilt kit is open until Sunday evening, so be sure to enter in time or stop by Teresa's instagram page next Friday for another chance to win a kit.

Friday, August 10, 2018

Finishing a Comfort Quilt

In my previous post I covered the first steps to take to make a memory quilt. Once you're ready to create the quilt, keep a few things in mind. First, remember that the fabrics are what makes the quilt special, so pick a design that makes them the star. Using large blocks is a good strategy for creating both a fast finish and a design that allows the fabrics to be the main feature. The blocks I created are about 26 inches square, so just nine blocks makes a good sized throw quilt.
Two, with the purpose of the quilt in mind, add to the comfort factor with both the backing and the quilting style. Select a cozy backing fabric. I picked a soft flannel. You may want to quilt minimally to maintain a soft drape to the quilt, as I did. As a bonus, simple straight line quilting about every two inches is also quick to do.
Consider the feature fabrics as your select the finishing touch of the binding. Often the clothing scraps will not be large enough for binding strips, so choose a complimentary fabric. I think this mini check blends well with the other shirting fabrics.
I hope the quilt will bring up a lot of fond memories and offer some tangible comfort.
My quilt design was inspired by this fabulous quilt by Shea. Although I was unable to find the block name or a pattern, it only required some simple quilt math. I have saved you the trouble if you want to follow the instructions below.

For each block you will need:
(4) 8 1/2 squares fabric A
(1) 8 1/2 square fabric B
(1) 12 5/8 square fabric C cut twice diagonally into (4) triangles
(2) 6 5/8 squares fabric C cut once diagonally into (4) triangles

Cutting the triangles from the squares as directed rather than individually means there will be no bias edges on the outside edge of the block. Best!

Wednesday, July 25, 2018

Ketchikan Quilt Pattern Release


I am pleased to share with you the Ketchikan Quilt pattern today. It has been a long time in the making! This queen sized quilt is the largest I have ever created, and the pattern, while easy to make, was quite involved to write. Each foundation pieced block is 22 inches, with a couple of setting blocks to make the sashing more distinctive. The thirteen page pattern includes fabric requirements, cutting and piecing instructions, printable foundation templates, a construction diagram, and a coloring sheet of the block to play with your own color placement.

Paper pieced blocks are perfect for scraps, as the pieces are generally small. They are also great for fussy cuts. I included some cute fussy cut centers for the stars. I made each block with different scraps but kept my palette to black, white, and grey. The large expanse of white background is meant to invoke the snowy expanse of the northern frontier, which was the inspiration for the quilt. It makes me think of stars and arrows, two critical means of survival.

I love how the feel of the quilt completely changes with different uses of fabric and color. My pattern tester, Kelly, chose a colorful print for the background and coordinating prints for the stars, arrows, chevrons, and stripes. It is so fun and cheerful.


Alissa worked with a woven background and an ombre solid. This gives the block a lot of depth and subtlety. Love it.

You can find the pattern in my Craftsy store, and I would love to see your version of the #ketchikanquilt

Monday, May 7, 2018

Rugby Stripe Baby Quilt

I pulled out my bin of 2 1/2 inch scrap strips to make some Rugby Stripe Blocks on a bit of whim. These blocks are so quick and easy to put together, before I knew it I had enough for a scrappy baby quilt.
The blues, greens, and blacks make this version more masculine than the first, larger iteration of the quilt. I love how fabric choice completely changes the look and feel of a quilt.

I quilted it simply with my Bernina's serpentine stitch. You can play with the width of the wave and the stitch length and use the side of the walking foot to gauge distance between rows of stitching. These are about an inch apart.

The binding is a crisp navy and white stripe that should fit the nautical theme of my friend's nursery, and the flannel back will make this quilt a cozy on for her new little boy. At 41 x 55 it is a nice size to serve him through his preschool years too.

Thursday, April 5, 2018

Scrappy Triangle Quilt


It seems fitting to finish this quilt in time for spring. (Well, technically it is spring, although we're expecting a bit of snow tomorrow.) The bright colors of the Anna Maria Horner fabrics are undeniably cheerful and full of life, just like the season, and the low volume prints set them off nicely.
I used 50 weight white, Aurifil thread to quilt the top in a free motion figure eight design, which I  recommend if you are new to free motion quilting or have a largish quilt to handle on a home machine. The design offers lots of places to stop and adjust your quilt without interrupting the flow of the shapes. It can also be modified to fill pieced shapes, like these triangles.
The binding is another Anna Maria Horner favorite, and the backing is a soft, white flannel.
I'm sending the quilt to my grandmother. It will drape over the back of her couch where she will see it everyday. At 54 x 71 it is also a good size to fold over her lap on chilly days. She may not remember that I made it for her, but I'll feel better knowing it's there with her although I can't be.