Showing posts with label quilted. Show all posts

Tuesday, February 23, 2021

Modern Quilted Appliqué Pillow

It has been absolutely frigid lately in the Midwest, and when it is that cold I just want to sit under blankets as much as possible. Hand sewing is perfect for such days, so I returned to improv appliqué in my latest project.

The technique of improv appliqué begins, for me, with appliqué shapes cut by hand without a template. I eyeball the shape and trim as necessary to adjust to the contours I want. Then I baste the pieces in place and appliqué with matching thread.


I prefer rather dense quilting on appliqué pieces because it makes them durable. This pillow cover is machine quilted about every quarter of an inch.

The finished pillow cover is 19 x 19 and fits a 20 inch pillow form nice and snuggly. The design is a little mid century modern meets 1970s with the coral, gold, and brown square arcs. You can find the finished quilted pillow cover in my etsy shop.

I'm thinking of attempting to make a how to video on this method of improv appliqué, if anyone is interested.

Monday, June 3, 2019

Midmod Improv Appliqué Pillow

Okay, so I'm just going to say up front that I am so excited about this pillow. I think it is the coolest thing I have made in a long time, and the technique has so many possibilities, my mind is whirring with what to make next.

Like the pillow I made recently, this is improv appliqué, meaning I cut all the shapes by eye, without templates. I riffed off the square in a square design but added a mid century modern twist with the rounded edges. It turned out just as I intended.

The pillow gave me a chance to try matchstick quilting over appliqué, and I'm happy with the result. The texture is great, and it doesn't overwhelm the design underneath, possibly because I used bold colors. I finally used Living Coral, the Pantone color of the year. Nice.

I will say this 16 x 24 piece took forever, as it is all hand appliquéd, needle turn, using my favorite Aurifil 80 weight thread. The matchstick quilting isn't quick either. But it was all worth it to me. I really love this. Having said that, the bit I enjoy is the making, rather than the owning. If you'd like a chance to add this functional art to your home, it is available for sale in my etsy shop. I doubt I'll make another, so this is a one of a kind piece!

Wednesday, January 9, 2019

Flying Geese Pillow


I drafted the elongated flying geese in this pillow as a foundation pieced pattern to create really crisp points. The high contrast of the black and white makes the simple design quite bold, which I like.

I quilted the flying geese minimally with an outline in black thread, while I filled in the white with a free motion swirl in white thread to keep the emphasis on the triangles.

I finished this 16 x 24 pillow with a lapped zipper back, and I think this quilted pillow cover will be an even better fit once it's washed.

Saturday, April 28, 2018

More Improv Quilted Placemats

I finished up another couple of improv quilted placemats for my charity project for the year which is placemats for Meals on Wheels (#placemats4mow if you want to join in) made using up leftover blocks and scraps.
This was originally a test panel of strata for Improvising Tradition (affiliate link, although it looks like you can buy a signed copy from me in my etsy shop cheaper than that at the moment).This panel taught me that I prefer strata that is more monochromatic, but I chose to celebrate the pops of green as is by binding in a leftover strip of Kona grass green binding.  The perfect backing presented itself as an old Denyse Schmidt print. Love those dots.
I had fun coming up with a different quilting design for each shape, although some worked out better than others and some got repeated.
I made several strips of the improv technique in the second placemat a while ago. Several of the strips became a pillow, but I had a spare strip I've been looking to use. Bingo!
These placemats are numbers seven and eight, so it looks like I'm on track to make my goal of twenty to donate by December.

Thursday, January 25, 2018

Quilted Logo Pillow

I created this quilted pillow cover as a gift for my taekwondo instructor. I drafted a foundation pattern to replicate the studio logo, and I'm really pleased with the accuracy I was able to achieve. And even though it looks really good with my Candy Coated quilt, I'm still going to part with it.
The quilting on this 20" pillow took longer than I thought it would, but I'm happy with the results. I used my walking foot and red thread to quilt the logo and filled the negative space with a simple square meander using a free motion foot.
My favorite finish for quilted pillows is an interfaced backing with a lapped zipper and hand finished binding. The pillow feels appropriately substantial and sturdy. I love the peek of red from the zipper.

Thursday, October 29, 2015

Wonky Stacks Pillow

I came across a beautiful improv quilt by Kathy Loomis via Pinterest and was pleased to find an informative blog post attached. Kathy explains the technique for making what I'm calling wonky stacks, a method she learned in a workshop with Nancy Crow. The technique is one of those easy, genius methods you immediately wonder why you didn't think of on your own. I pulled out my scrap strips to play (this technique is the perfect use for scraps). The method is so simple! Just sew strips together in groups of three (using light, dark, light or dark, light,dark), subcut into bars, and stack.
I trimmed the bars to  4 1/2" wide and joined enough to make a column 20 1/2" long. I joined five columns to create a 20" pillow top.
It was so fun, I made another, playing with value by using light aqua strips paired with navy strips.
I quilted the orange pillow in straight lines and the blue pillow in a fun lily pad free motion design from Christina Cameli's book on free motion quilting. I backed both pillows with a simple self-lining envelope closure (tutorial from Crazy Mom Quilts).
 
In the off chance you don't want to rush to your sewing machine and make your own, both pillows are available in my etsy shop.

Tuesday, April 14, 2015

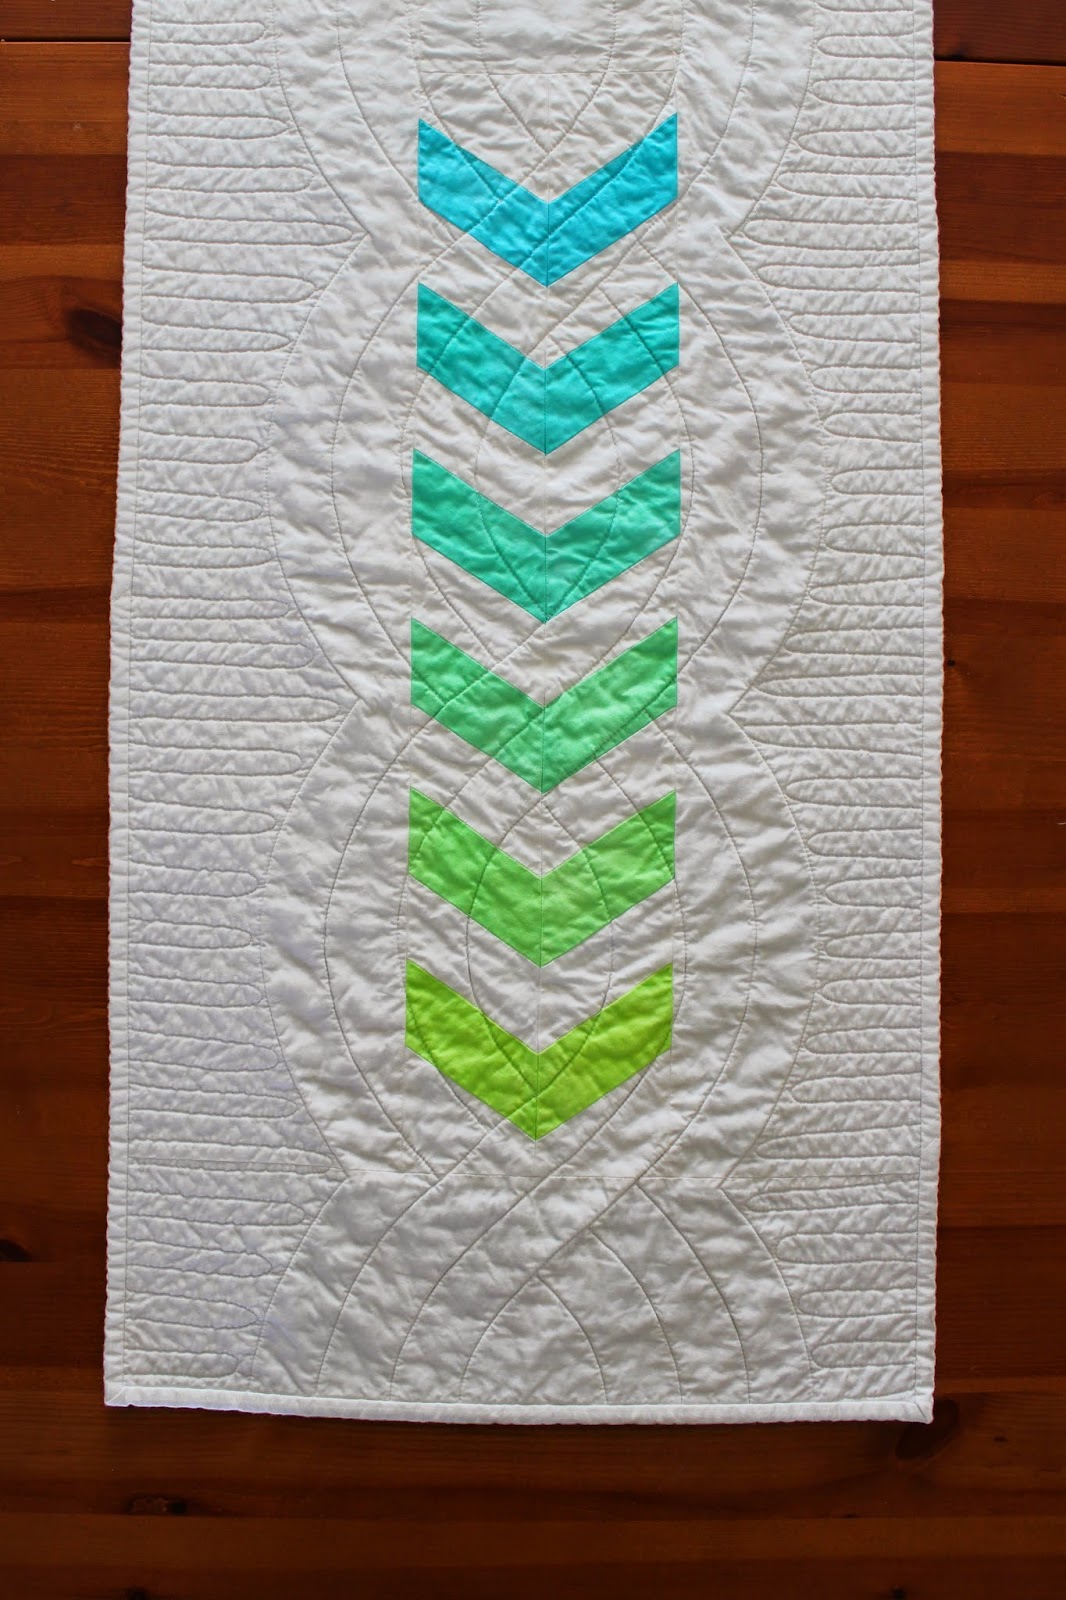
Color Gradient Runner


For the longest time, I kept these gorgeous, glowing, hand dyed fabrics, made in a workshop with Kim Eichler-Messmer who wrote Modern Color, folded neatly in a pretty stack. I couldn't pick one design that I thought was special enough for them. I finally decided to try it all. I chopped my fat quarters into a variety of shapes and sizes, and I've tried a bit of everything with them. I'm planning a random sampler of sorts. More on that later, but no promises it will be soon.
These chevrons didn't fit with the rest of the blocks, so I combined them into a minimalist runner. I seem to be on a bit of a table runner kick recently.


In any case, the poor fabrics sat for the longest time again, as I tried to decide how to quilt the runner. I wanted to play off the directional arrow-like design of the chevrons by creating a rope pattern, moving as it weaves under itself. If I had to do again, I would stick with simple straight line quilting. I like the rope motif, but I think it takes away from the simplicity of the chevron design. I'm glad I tried it though.

At 16" x 57" this a big table runner. Between the original design and the hand dyed, color gradation fabrics, it really is one of a kind. I'm listing it in my esty shop.

Monday, March 23, 2015

Quilted Coasters


I needed a small project to make quickly as a thank you gift for a special friend. I had some leftover scraps from my table runners, so I decided to turn the strip sets into some quilted coasters. The fabrics are shot cottons paired with black Essex linen.
I used the basic construction method described in my book, Improvising Tradition, for the Jewel Box Coaster project (although these coasters were pieced and then quilted, rather that created quilt-as-you-go). The use of insul-bright in addition to a layer of batting gives the coasters a nice rigidity while still being soft. I don't know why I haven't made more coaster sets.  They are such a fun, quick project!

Wednesday, October 29, 2014

Free Book Excerpt and Download

I'm so pleased to share another project from Improvising Tradition Improvising Tradition with you today.  This project, the Jewel Box Coasters, is from the strata section of the book.  It pairs miniature strata piecing with quilt-as-you-go to create these functional and beautiful coasters.  I love how the quilting and Essex linen frame the improv center.
The exciting news is that you can read an excerpt from the book and download the project for free over on Sew Mama Sew today! 

Tuesday, September 30, 2014

Autumnal Improv Remix

The minute I wrapped up the Improv Table Runner for my friend, I started thinking about making another one.  While I didn't have enough Oakshott scraps leftover to make another runner, I did have just enough to make a quilted pillow.
 
The pillows is made with the same techniques and materials as the runner.  I even quilted it the same way.   I just made each piece a bit smaller, of course, and I backed it with a self lining envelope closure and added brown binding.
 
The quilted pillow cover is about 15 x 27, and I found a down pillow form at a home furnishings store that makes it super squishy and cozy.  We're really enjoying our autumnal décor this month.

Monday, September 8, 2014

Improv Wonky Cross Quilt

This 40 x 50 baby quilt is the product of my blocks from guild friends in the Whatever Bee.  I made a practice wonky cross version (a maquette, if you will) a few months ago which helped me to identify the features I liked in this sort of a slice and insert block.  Like the practice quilt, I kept the blocks the same height but varied the widths.  I also added a few half blocks and stacked them in pairs, just for fun (hint: this is a great fix for a block that may end up being slightly too small).  Improv quilting is awesome like that. Here a fun tutorial by a guild member Carla on how to make this type of block, two at a time.
This type of improv block is perfect for a bee.  It gives the quilters specific instructions while allowing them some flexibility to experiment.  My friends were all kind enough to make me two blocks, so I had some extra to use on the back of the quilt.
I am donating this quilt to one of our guild's community service projects, Birthday Blessings, a local charity.  I am also submitting it to 100 Quilts For Kids.  This annual quilt drive is great because it allows you to donate locally to a children's charity of your choosing.  Just add a link to an online photo of your quilt, and you can participate.  There are prizes!  The link is open through the end of the month, so you still have time.  The post even includes ideas for simple quilts to make.
Thanks so all my friends who contributed blocks!  I know this is going to be well used by some little guy in our community.