I first spotted the Road Trip Redux Quilt on Instagram, and I was struck by the design's potential to be manipulated by fabric placement. Each version of the quilt looks quite different. The quilt pattern is by Karen of Blooming Poppies and can be purchased through her etsy shop. (FYI, this is not a paid promotion. I bought my pattern and am offering a review so you can avoid some of the challenges, mostly of my own making, which I encountered piecing the quilt).
This clever quilt design is comprised of three simple blocks: flying geese, half square triangles, and diamond in a square. Depending on fabric placement, the possible variations of the quilt are infinite, which is the greatest strength of the design, in my opinion. Keep in mind, you don't need to make changes. You could simply swap a new color for each one in the original, and make no further changes. But if you do decide to do more than substitute fabrics for the ones used in the pattern, which of course I did, you will need to take a few additional steps.
It may be obvious, but changing the fabric placement in the design will mean you will need to calculate your own fabric requirements and cutting instructions. To do this you will need to do some quilt math and figure out how many of each block you will need for each fabric. This is where I made my mistakes! The pattern is written in such a way that each of the three blocks is pieced in a specific way, using only squares of fabric. For example, the flying geese block is made using a single large square which will become the goose and four smaller squares which will become the outside triangles. That single center square and four outside squares will make four flying geese blocks. SO, when you calculate how many flying geese blocks you will need to cut from a certain fabric, keep in mind the square for the goose will make four blocks, not one. This will help you avoid overcutting, like I did.
The pattern also includes instructions for the diamond in a square block, as well as the half square triangle blocks. The construction of these blocks use squares differently, so pay attention, again, before calculating how many squares to cut. The half square triangle blocks are made from two squares of fabric to create four triangles in two half square triangle blocks. The diamond in a square will use four squares to make four triangles on the outside of the block though. Just understand how each block is constructed before you do the quilt math, and you will be fine.
The pattern has several great features. It includes a blank coloring sheet of the design, so you can play around with fabric and color placement. I colored several versions before I settled on my design. This will allow you to mock up your quilt easily. The instructions also include nice illustrations for construction of the blocks, and there is little waste in the method. Another asset of the pattern is that it includes cutting dimensions to make the quilt in two sizes using the same instructions - a baby or throw size.
Check out the hashtag #roadtripreduxquilt to see various versions of the quilt for inspiration. I'm waiting for backing to arrive so I get start finishing this cute baby size quilt.
Showing posts with label HST. Show all posts
Thursday, February 13, 2020
Wednesday, January 29, 2020
A Lesson in Value, Part 1
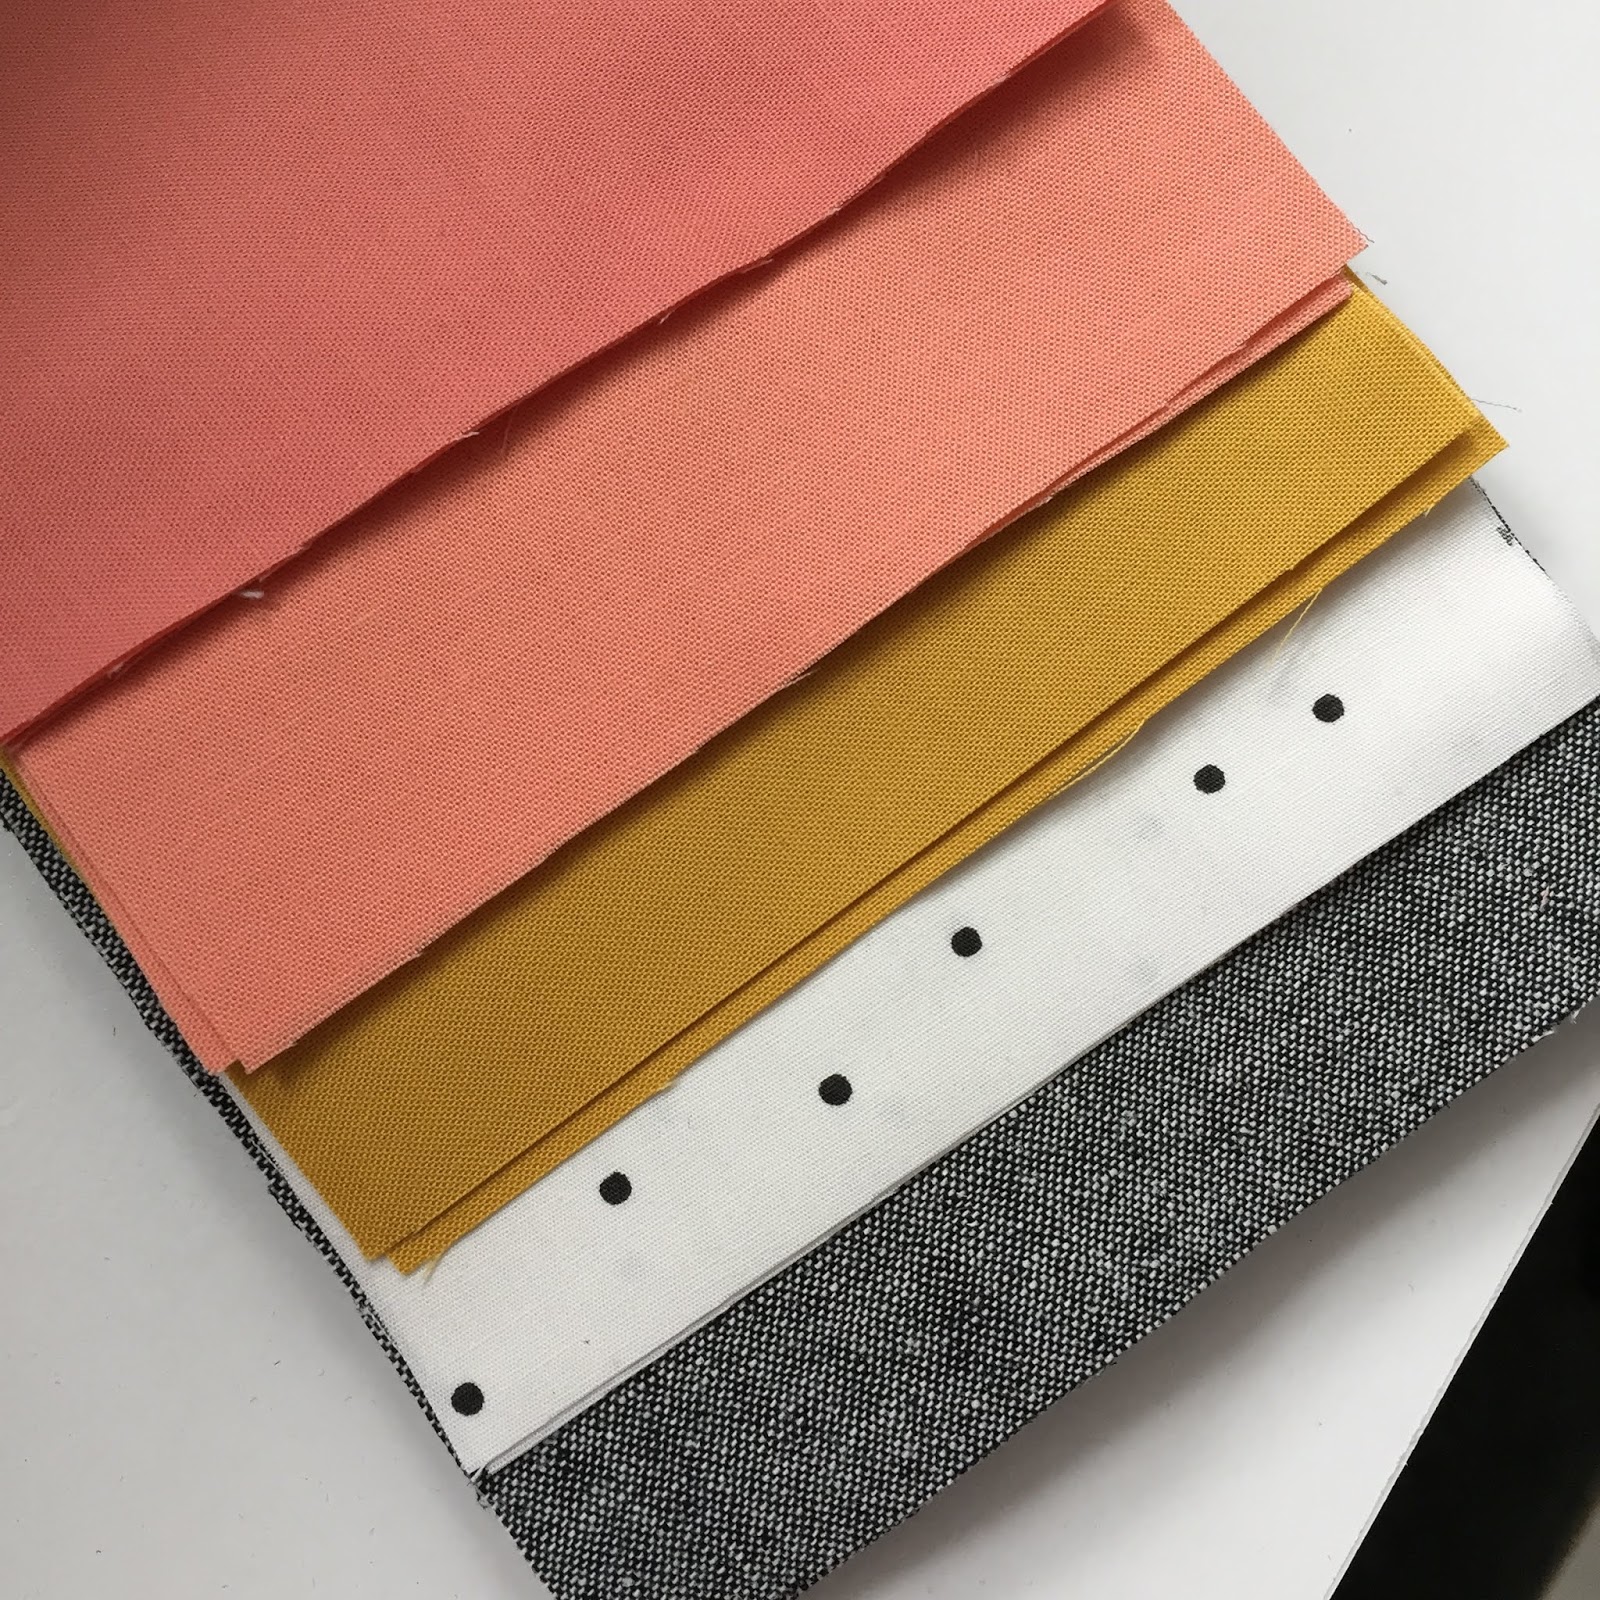
I learned a valuable lesson (pun intended) as I got started on a version of the Road Trip Redux Quilt (more on this pattern later). I chose to pair a handful of solids with my favorite Essex linen in black and a fun black and white polka dot print.
I wondered if the two corals were too close in value, but since they were both in my stash, I wanted to make it work. I made a test HST block and thought the difference in value would probably be alright.
A quick trip to my local fabric shop, and I think I have a solution. The bottom coral will replace the medium coral in the middle that I used previously. It has a noticeably lower value than the darkest coral, which I think will create the contrast the design needs. Watch this space.
No block will be wasted however, as a quirk in the pattern (okay, maybe user error - again, more on that in a subsequent post) led me to cut far more pieces than I need, so another Road Trip Redux Quilt is likely in my future, perhaps with other colors added too.
I wondered if the two corals were too close in value, but since they were both in my stash, I wanted to make it work. I made a test HST block and thought the difference in value would probably be alright.
However, when I put some of the blocks on the design wall, I found the difference in value was not great enough to make the design pop. The two corals are so similar, they muddy the layout somewhat - not what I had in mind.
Here is my rough color sketch to give you an idea of what I want the design to look like. I had already changde my mind about the pale yellow, opting for mustard for more of an edge.A quick trip to my local fabric shop, and I think I have a solution. The bottom coral will replace the medium coral in the middle that I used previously. It has a noticeably lower value than the darkest coral, which I think will create the contrast the design needs. Watch this space.
No block will be wasted however, as a quirk in the pattern (okay, maybe user error - again, more on that in a subsequent post) led me to cut far more pieces than I need, so another Road Trip Redux Quilt is likely in my future, perhaps with other colors added too.
Tuesday, April 7, 2015
A Rainbow of Leftovers
When I trimmed the strip sets in my improv scrappy rainbow table runner, I created some leftover half square triangle blocks. Scraps from a scrap project are the sweetest kind! I started playing with them on my design wall and came up with a symmetrical layout. It is probably a traditional block (although I don't know the name of the block, do you?).
I love the way the colors flow across the block, and the little pieced sections in the triangles add such quirky details. Each square finished at 1 3/4 inches. I added a scrappy border and binding. Even the backing and batting are scraps.
I played around with some point to point free motion quilting. It is very rough, but I'm always amazed how the uneven curves and wonky lines form into something beautiful when taken as a whole.
This 19 inch square mini quilt will be a nice addition to my sewing space. I am enjoying spring, but wishing for the pollen to die down.
I played around with some point to point free motion quilting. It is very rough, but I'm always amazed how the uneven curves and wonky lines form into something beautiful when taken as a whole.
This 19 inch square mini quilt will be a nice addition to my sewing space. I am enjoying spring, but wishing for the pollen to die down.
Tuesday, December 3, 2013
It's Still Fall, Right?
I finished up my quilt for Fall over the holiday weekend. Technically, it is still autumn until December 20th, so I'm calling it a win. I'm sure it won't be the last quilt that doesn't get done as quickly as I'd hoped.
The weather is about to turn really cold here, so I snapped some quick pictures while the sun was out today.
I quilted straight lines on either side of the main diagonal seams to prevent shifting during the simple free motion, dot to dot design I quilted in each diamond.
It creates an interesting texture on the back of the quilt. The flannel back is going to be so cozy. I found this Timeless Treasures crosshatch flannel on a super sale, and I've heard great things about how it washes.
The binding is an orange hounds tooth by Denyse Schmidt.
Now that it has been documented, this 60" x 60" quilt is ready for use on the couch...next to the Christmas tree. Oh well. Maybe I'd better start, now, on a Christmas quilt for next year.
The weather is about to turn really cold here, so I snapped some quick pictures while the sun was out today.
I quilted straight lines on either side of the main diagonal seams to prevent shifting during the simple free motion, dot to dot design I quilted in each diamond.
It creates an interesting texture on the back of the quilt. The flannel back is going to be so cozy. I found this Timeless Treasures crosshatch flannel on a super sale, and I've heard great things about how it washes.
The binding is an orange hounds tooth by Denyse Schmidt.
Now that it has been documented, this 60" x 60" quilt is ready for use on the couch...next to the Christmas tree. Oh well. Maybe I'd better start, now, on a Christmas quilt for next year.
Friday, November 8, 2013
A Quilt for Fall
The fall colors have been beautiful here in the Midwest the past week or two. They inspired me to make a quilt in orange, red, yellow and brown, so I pulled a bunch of fabrics from my scrap bins. I cut them to 7 1/2 inches square.
Inspired by this gorgeous value quilt by Krista, I paired each square with a warm, low volume print cut to the same size and made half square triangles (HSTs).
As an aside, if you are going to make a HST quilt, I really recommend a bloc loc ruler (it has a groove on the underside which butts up against your center seam, keeping it perfectly in place as you trim) and rotating cutting mat. You do need to press your seams to one side to use this type of ruler, but boy is useful. They come in a variety of sizes too (I bought mine from the Fat Quarter Shop and am, sadly, getting no kick backs from anyone for this plug). Trimming HSTs makes each block perfect and easy to sew into a quilt top. The ruler I used was 6 1/2" and my HST squares finished at 6".
Inspired by this gorgeous value quilt by Krista, I paired each square with a warm, low volume print cut to the same size and made half square triangles (HSTs).
As an aside, if you are going to make a HST quilt, I really recommend a bloc loc ruler (it has a groove on the underside which butts up against your center seam, keeping it perfectly in place as you trim) and rotating cutting mat. You do need to press your seams to one side to use this type of ruler, but boy is useful. They come in a variety of sizes too (I bought mine from the Fat Quarter Shop and am, sadly, getting no kick backs from anyone for this plug). Trimming HSTs makes each block perfect and easy to sew into a quilt top. The ruler I used was 6 1/2" and my HST squares finished at 6".
I finished piecing the top this afternoon, which happens to be a perfect, windy autumn day.
I have some soft flannel for a cozy backing fabric. I just hope I get a chance to finish this quilt before fall flies by.
Wednesday, November 9, 2011
Good Folks Baby Quilt
I finished up the baby quilt made from the trimmed HST from this quilt. With the quilting, I emphasized the zigzag shape in the solid, and I tried a free motion design within the diamonds.
I love the colors against the gray and that I get to showcase every fabric from my treasured Good Folks collection in one place.
This was my first time binding a quilt with shot cotton, and it is perfect for binding - so lightweight and soft. The color is Lipstick.
Another first for me with this quilt was a flannel backing. For some reason I thought flannel would be hard to quilt, but it was no different than quilting cotton. And it feels so great! Very cuddly for this baby quilt. It is another Anna Maria Horner fabric, from her Folksy Flannel line. I really like how many of her fabrics, from various lines, coordinate well.
This baby quilt finished at 39 x 39.
I love the colors against the gray and that I get to showcase every fabric from my treasured Good Folks collection in one place.
This was my first time binding a quilt with shot cotton, and it is perfect for binding - so lightweight and soft. The color is Lipstick.
Another first for me with this quilt was a flannel backing. For some reason I thought flannel would be hard to quilt, but it was no different than quilting cotton. And it feels so great! Very cuddly for this baby quilt. It is another Anna Maria Horner fabric, from her Folksy Flannel line. I really like how many of her fabrics, from various lines, coordinate well.
This baby quilt finished at 39 x 39.
Saturday, October 29, 2011
In Progress
I finally finished trimming up the HSTs leftover from this quilt top.
I arranged them simply into a baby quilt. I'm planning to quilt it to accentuate the zigzag that is formed in the negative space.
This is now the fifth quilt top I have awaiting quilting. Better move these WIPs along.
I arranged them simply into a baby quilt. I'm planning to quilt it to accentuate the zigzag that is formed in the negative space.
This is now the fifth quilt top I have awaiting quilting. Better move these WIPs along.
Wednesday, June 22, 2011
A Whole Handful
Friday, June 17, 2011
Halfway
I have made twelve modified shoo fly blocks from my prized Good Folks collection. I'm halfway through my fat quarter set, and I've paired them with Kona medium gray. I'm making four blocks at a time, which works well for me.
And this is my pretty stack of bonus HST blocks!
Friday, December 31, 2010
2010 in Review
Here is the obligatory mosaic of some of my best crafty bits from 2010. I'm actually very pleased I figured out how to make one of these.
1. Raw Edge Circle Quilt top, 2. Redbud Blossoms Quilt, 3. Tickertape Doll Quilt 3, 4. Camera Case Wristlet, 5. Hexagon pillow, 6. Summer Sunshine, closeup, 7. Pure Baby Boy, 8. Summer Sorbet, 9. String Pieced Pillow, 10. Voile and Linen Sewing Machine Cover, 11. Neptune Quilt, closer view, 12. Out for a Walk #2, 13. Plume Sails, 14. Quilted French Press Cozy, 15. Be Merry mug rug, 16. tickertape doll quilt, 17. My First Bee Quilt, 18. Scrappy Squares Baby Quilt, 2, 19. Coordinating Bunting, Pillow and Quilt, 20. tickertape mini quilt, 21. Around Town, 22. Busytown Quilt, 23. Ruffled Wristlet Keychains, 24. whirligig doll quilt - close up, 25. Monogram Pillow
1. Raw Edge Circle Quilt top, 2. Redbud Blossoms Quilt, 3. Tickertape Doll Quilt 3, 4. Camera Case Wristlet, 5. Hexagon pillow, 6. Summer Sunshine, closeup, 7. Pure Baby Boy, 8. Summer Sorbet, 9. String Pieced Pillow, 10. Voile and Linen Sewing Machine Cover, 11. Neptune Quilt, closer view, 12. Out for a Walk #2, 13. Plume Sails, 14. Quilted French Press Cozy, 15. Be Merry mug rug, 16. tickertape doll quilt, 17. My First Bee Quilt, 18. Scrappy Squares Baby Quilt, 2, 19. Coordinating Bunting, Pillow and Quilt, 20. tickertape mini quilt, 21. Around Town, 22. Busytown Quilt, 23. Ruffled Wristlet Keychains, 24. whirligig doll quilt - close up, 25. Monogram PillowThanks to each of you for visiting my little blog over the past year and for all your kind comments both online and off.
Monday, June 21, 2010
All for Me - Neptune Quilt
Here's is what I've been working on for the last week or so - my Neptune quilt.
The top has been sitting in my closet for a few months now, and now that it's done I don't know why I waited so long to finish it. I love it! This is going to be my very own quilt to snuggle up on the couch with. 44 x 57 is just the right size.
Didn't quite get the back to line up the way I had hoped. Also, note to self - don't do a seriously pieced back when there are already tons of seams on the top of the quilt to deal with!
The lime green and aqua are what drew me to Neptune by Tula Pink, and I love how soft and watery they look together when pieced in this way. I did straightline quilting, more or less following a guide on my walking foot.
I made the quilt from parts of two honey buns. You can read more about the process here, here, here, and here.
Tuesday, February 9, 2010
Neptune Quilt - pieced top
Here is the pieced top. I decided on a new layout, and I'm really pleased with how it turned out. I like the softness of the colors when they are randomly placed, as opposed to separating them. As you can see, I mostly alternated direction of the honey bun strips in the HSTs, but I wasn't a stickler about it. I think quilts are a lot more interesting if the blocks aren't completely uniform.
It turned out to be a nice lap sized quilt. I'm working on a pieced back, and I need to order the binding. I'm finding that Neptune fabrics are getting really scarce out there, so if you like them, gather the jelly rolls, etc. while ye may.
Monday, January 18, 2010
Trimming HSTs
I don't feel too badly that I'm having to trim my HSTs to make them square, since Red Pepper Quilts says she always includes this step too. Goodness knows she's a much more precise piecer than me. However, holy moley this is a tedious business. Here's where I started: one down and over 100 to go.
Here's my pile of trimmings halfway through the pile. This may take a while.
Subscribe to:
Posts (Atom)