I made a set of travel tags for family, and some friends requested a tutorial. It's been a while since I wrote and offered a free tutorial on the blog, so here it is as a big thank you for stopping by and leaving such kind comments over the years. These beautiful travel tags not only serve to mark your luggage should it become lost, they also make your bag easier to spot. Set your ubiquitous black rolling bag apart from the rest in the luggage return this summer. I'd love to see what you make, as always. Drop me an email or hashtag your work online with #handmadetraveltags
You may notice the
June Tailor Quilter's Cut'n Press
in the background of many of the photos. It is a cutting mat on one side and a pressing surface on the other other. It's the perfect tool for a small project like this when you don't want to get up and down to use an ironing board because it fits right next to your machine.
Handmade Travel Tag
Tutorial by Alexandra
Ledgerwood
Materials
Scrap of white fabric 3 x 9 1/2 or larger
Fat quarter or scraps of outside fabric
Interfacing scraps
Thread matching the outside fabric
Permanent pen
Cutting instructions
From the outside fabric, cut
(1) 3 x 9 1/2 rectangle
(1) 2 x 3 rectangle
(1) 2 1/4 x 14 strip
From the white fabric, cut
(1) 3 x 8 rectangle
From the interfacing, cut
(2) 3 x 9 1/2 rectangles
Sewing instructions
1. Using a permanent pen, write the address on the white fabric,
on the right half of the rectangle, leaving at least 1/2 inch from the right
edge.
Tip: I type the address in a word processing program and
trace the address onto the fabric directly from my computer screen.
2. Sew the 2 x 3 rectangle of outside fabric to the white
fabric, near the address along the 3 inch edge, using a quarter inch seam
allowance. Press seam open.
3. Following package instructions, apply the interfacing to
the wrong side of the outside fabric rectangle and the white fabric unit.
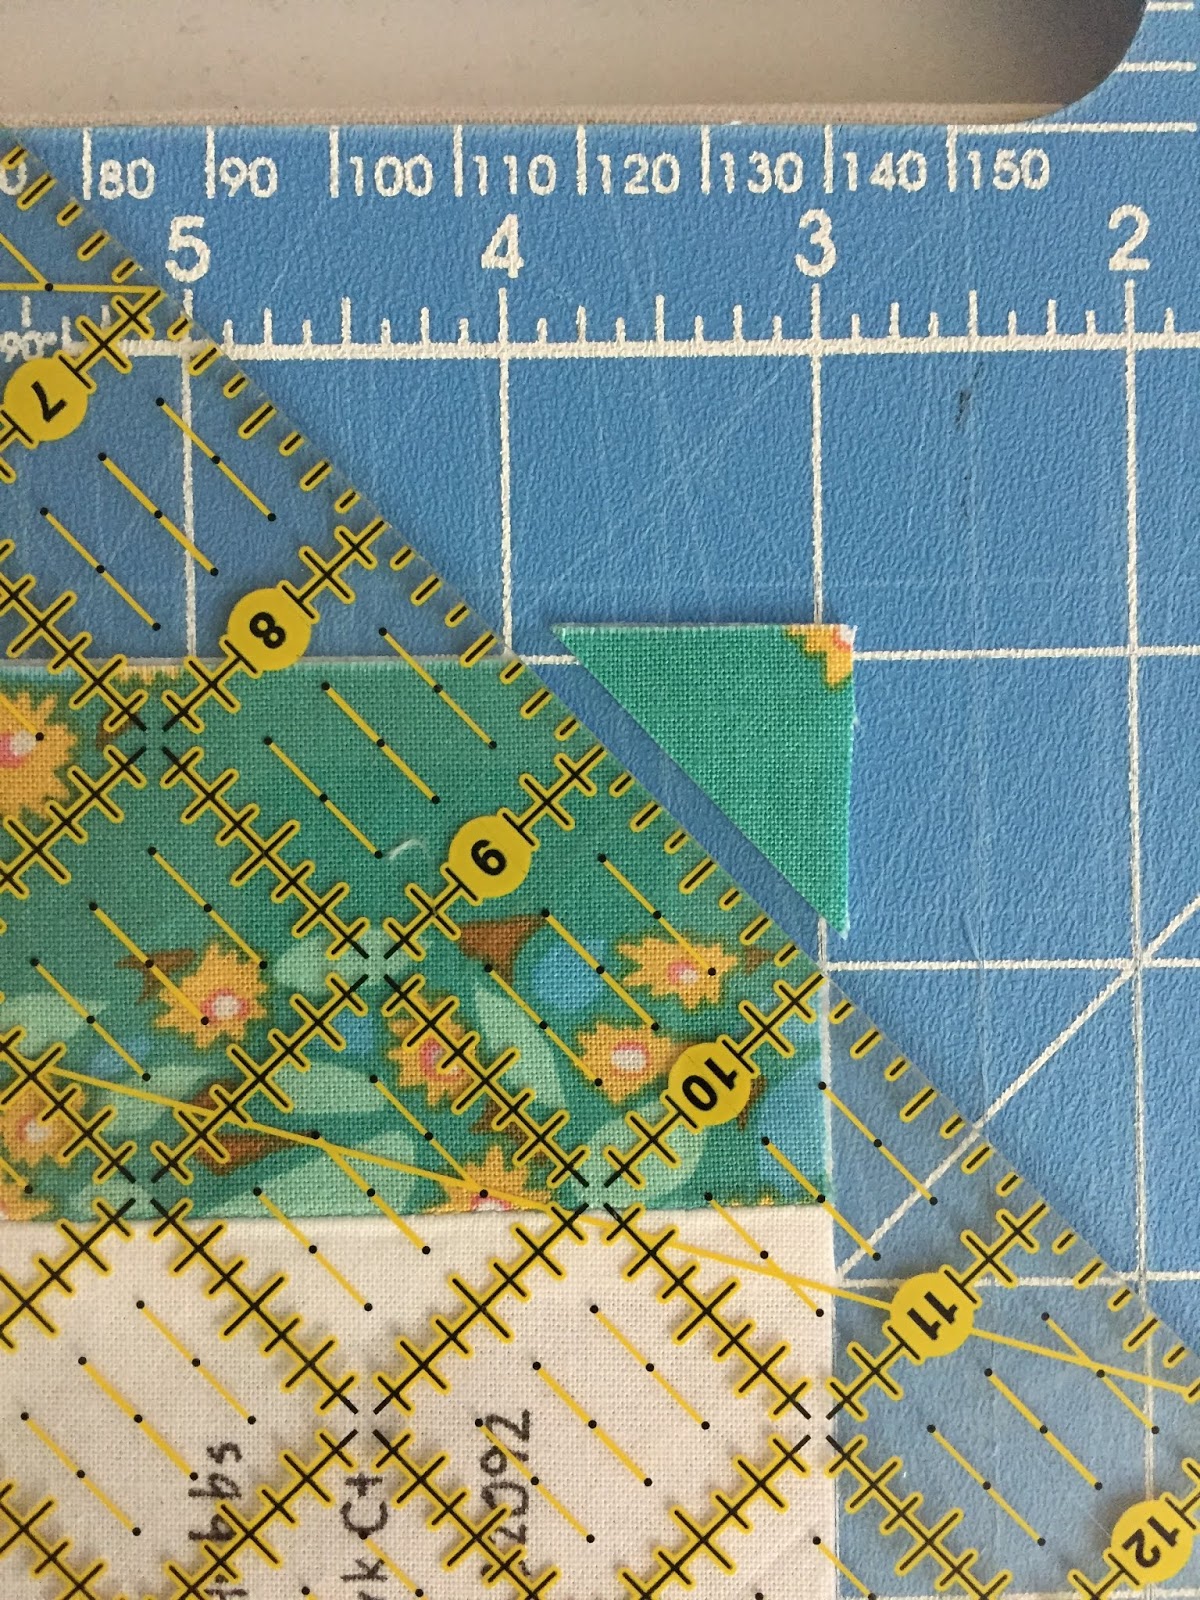
4. Trim one end of both rectangles to create the pointed end
of the luggage tag. Following the inch markings on your cutting mat, place your
ruler diagonally from one inch mark to another as shown in the photo, and trim
off the triangle. Repeat with the other corner.
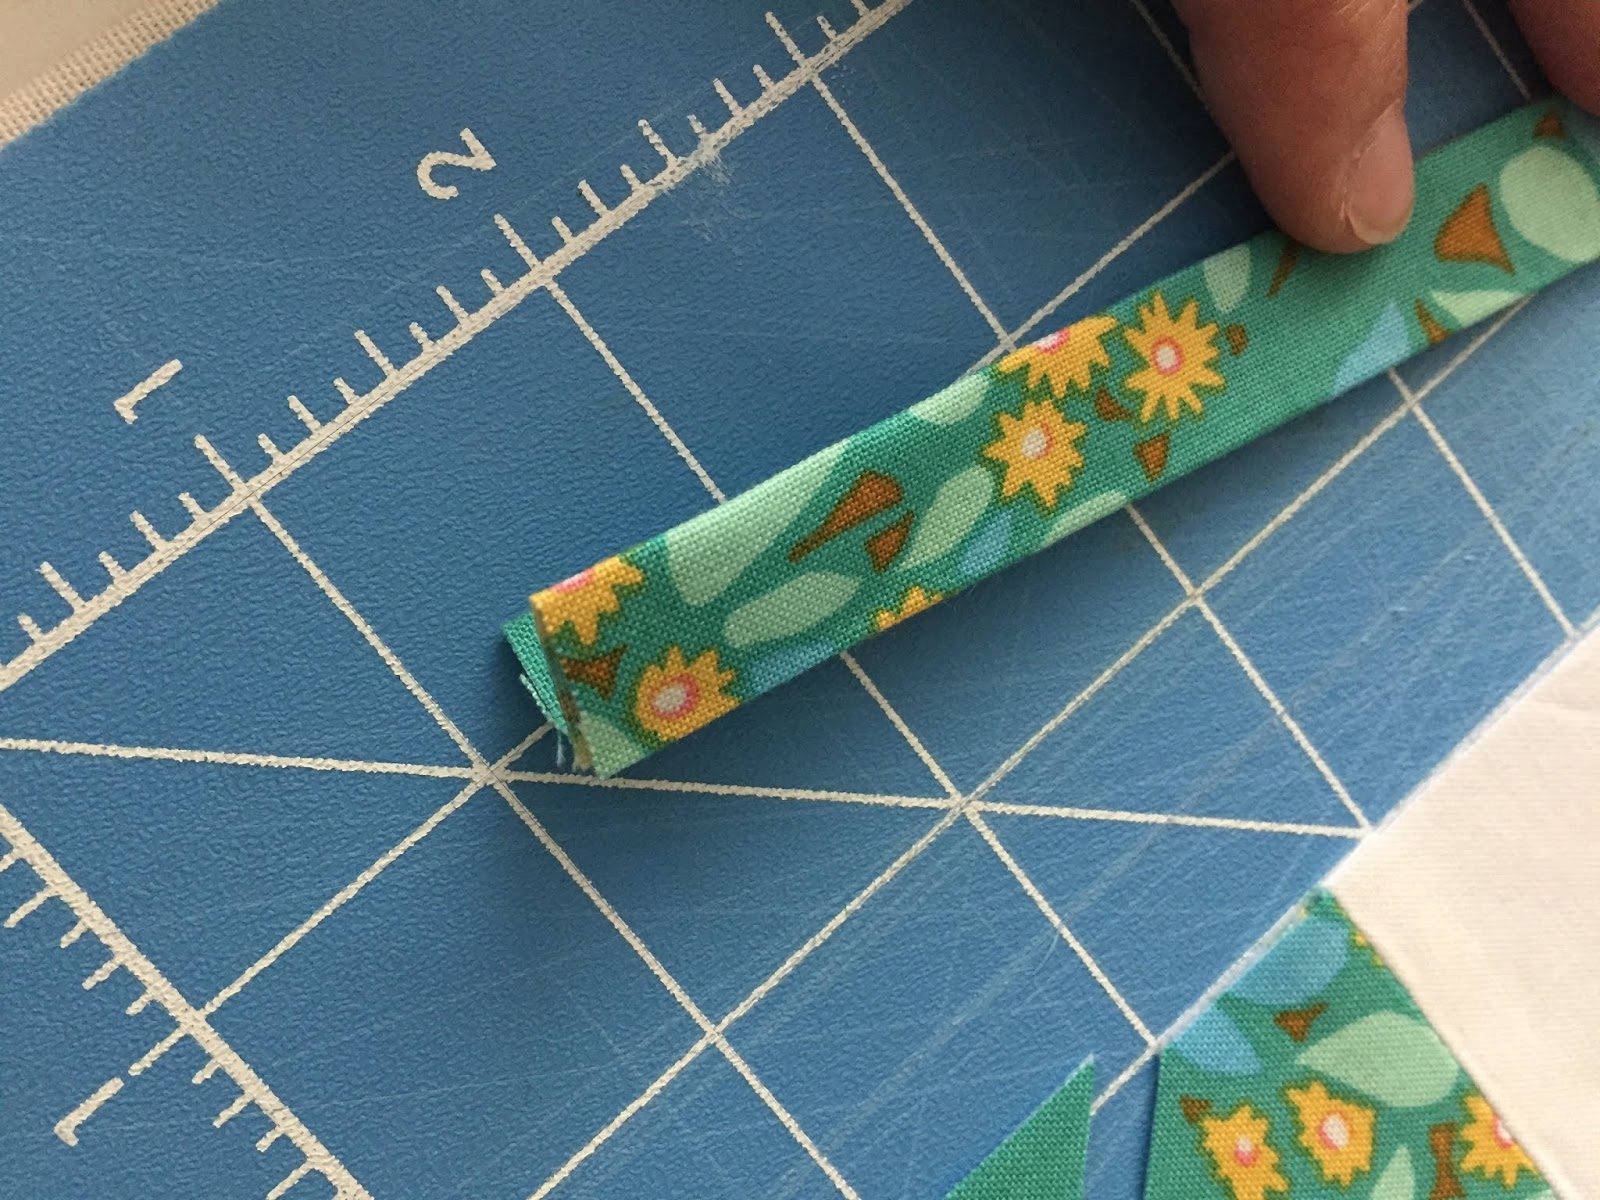
5. Fold the 2 1/4 x 14 rectangle in half lengthways and
press. Open up the rectangle, and bring the outer edges to meet in the center.
Press. Fold in half again, lengthways, to create a narrow strip, with the raw
edges encased in the center.
6. Edge stitch along both long sides of the strip.
7. Bring the two raw edges of the strip together and
temporarily pin in the center of the straight end of the 3 inch edge of the rectangle of outside
fabric. Right sides facing, place the white fabric unit on top, matching the
edges carefully. Remove the temporary pin and pin through the outside fabric,
the strip, and the white unit.
8. Pin and sew around all the edges with a 1/4 inch
seam, leaving about two inches for turning.
Tip: Be careful not to sew over the folded strip on the
inside.
9. Turn right side out, and press.
10. Edge stitch around the outside edge.
11. Create a button hole in the center of the outside fabric
at the pointed end of the tag. The button hole should be perpendicular to the
address and be the same length as the width of your strip, a little over 1/2
inch.
12. Fold the tag in half, overlapping the outside fabrics
slightly to hide the inner white fabric but not folding over the address
inside. Press.
13. Edgestitch along the fold.
14. Push the strip through the button hole, and your handmade travel tag is complete.