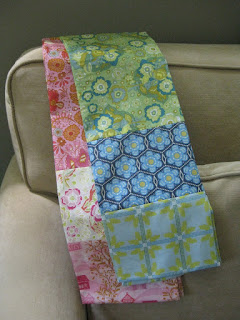
Thursday, September 30, 2010

New Fabrics

Warning: if you are trying to avoid buying more fabric, do not read the following (you should also avoid the blog True Up).

So, I needed to buy a few fat quarters to make a custom french press cozy. Something in orange, since I've been branching out in my color choices lately.
I found this wonderful orange print and coordinates at Hawthorne Threads by using their color selector tool. You can find a print you like, and below the description are buttons of each of the colors in that print. Click on a color and it will pull up all the fabrics they have that include that shade! Amazing right? Soooooooo helpful.
L to R: Bloom and Grow by My Mind's Eye, Antiquity for Michael Miller, High Society by Khristian A. Howell
Here's the dangerous part - they have tiered pricing, so the more you buy, the less expensive it is by the yard. Yikes. Which is why, of course, I also had to put these in my cart. I'm saving money right?
Spa by Rosemarie Lavin
By they way, I'm not getting any money from Hawthorne Threads for this recommendation :) - I just love getting tips on great places to find fabric, so I thought I'd share.

Wednesday, September 29, 2010

Back to Booties

I found this adorable Japanese fabric with tiny little trains on it. I thought I had bibs and booties out of my system, but doesn't this print just beg to be made into cuteness for little baby boys?
I don't have any infants arriving in my life, but maybe you do. In that case, these are now in my shop. If you want to make your own, the booties are made from a pattern by weepereas on etsy, and they are reversible! The alphabet print I used to back the bib is from American Jane's new line, Punctuation.

Thursday, September 23, 2010

Around Town

Well, I already had six blocks made, from the tutorials. Why not whip up a few more for this cute baby quilt? You can do it easily enough too!

You can see with all the blocks together that the vehicles are slightly larger than in the original quilt. I did this to make photographing each step of their assembly easier. I think I prefer the teeny trucks of Busytown, but this is fun too.By the way, you can find pdfs of instructions for these vehicles, as well as all of my most recent tutorials, here.

Monday, September 20, 2010

Pieced Vehicles, Improv Style - Excavator Tutorial

This excavator is the last in this series of improvisationally pieced vehicles. It requires a few more steps than the other vehicles, and it's a little finicky. The results are pretty fun though, if I do say so myself.
I'd love to hear from any of you who try out any of the tutes. Please let me know if you have any questions and I'll try to answer them here. There are purposely very few measurements included, since these are done improv style. You'll really get to make them your own!
Excavator Tutorial


Saturday, September 18, 2010

Nice and Cozy

I think I've perfected my french press cozy design. This larger size slides easily on and off the press, while being snug enough to lock in the heat.

It's available in my etsy shop, and soon I'll list a couple more in a medium size which will better fit smaller presses. Luckily the first one I made fits my Dad's press!

Thursday, September 16, 2010

Pieced Vehicles, Improv Style - Bulldozer

The next vehicle in my installments of improv piecing tutorials is the bulldozer. In the next few days I'll share the final tute - a digger. Then we'll be returning to our regularly scheduled, non-vehicle related posts :).

Wednesday, September 15, 2010

Pieced Vehicles, Improv Style - Tractor

I heard from several of you whose little boys love tractors, so here's my attempt at piecing one. I'm going to do just a couple more vehicles in this series of tutorials, so let me know if there is one you're dying to see. Otherwise I'll pick a couple of my faves from this quilt.

I made a last minute addition to this block, and it serves as a good example of how improv piecing goes, I think. You can find it at the end of the tute.
Tractor Tutorial


Tuesday, September 14, 2010

Pieced Vehicles, Improv Style - Car

Here is a really simple block to make. If these pieced vehicles seem a bit intimidating, you might want to start with this little roadster.

Sunday, September 12, 2010

Pieced Vehicles, Improv Style - Front End Loader


Next up in the tutorials for improv pieced vehicles, as found in this quilt, the front end loader.

Obviously, these vehicles are very stylized. What's most important to me when I make something like this is how the block reads. Is this vehicle realistic? No. Does it read as a piece of construction equipment? Yup - at least to my four year old! That's what I'm going for. I just try to reduce a vehicle down to its most basic shapes. You could use this technique to make a quilt block representing anything.
Front End Loader Tutorial


Saturday, September 11, 2010

Pieced Vehicles, Improv Style - Ambulance

I've had many questions about how I pieced the vehicles for this quilt. No, I didn't use paper piecing, and no, I didn't use a pattern. I'm not making a pattern either :). I used improvisational piecing to make them, which is a method. There are lot of great tutorials out there for houses and trees. I'll share a couple of tutes with you for various vehicles I included in my son's quilt.

Whitney, these are for you!

Today, the ambulance block.

Ambulance Tutorial


Friday, September 10, 2010

Hot Java

My father likes his coffee hot. Very hot. He also enjoys using a french press to brew coffee. The problem is, the glass carafe doesn't keep coffee hot while it brews, much less keep any extra warm until you're ready for your second cup. So, he asked me to make a quilted cozy for his french press. I looked around and found many cozies on etsy, but none covered the top of the press. Logic tells me this is where most of the heat would escape. Here is my solution. A cozy, with a layer of insul-brite as the batting, with a drawstring closure at the top. Open, you slide the cozy over your press.
Then pull the strings to trap in the heat. The hole is big enough to allow you to press down the lever when brewing is done, without removing the cozy. Obviously, it does have to be removed to pour the coffee, but my goal is to make it slide easily on and off. This first attempt is a bit snug. I'll add some ease, and hopefully attempt number two will be perfect! I'm wondering if something like this might be a fun item for my etsy shop.
This project definitely made me fall in love with Mingle circles in brown, as well as as the cute munki munki coffee cups. Must get more of both!

Monday, September 6, 2010

Some for You, Some for Me

I finished up a couple more voile scarves, and decided I needed to make something for myself with this lovely fabric. Determined to use only the scraps I already had, I sketched out this sewing machine cover.
I used Amanda Jean's no triangle method for the zigzags. No problem. Then I chose to pair the voile with linen and set the zigzags on the bias. If you're more experienced with these materials than I am, you know those were likely two big mistakes. With some hair pulling and frustration over wavy edges and stretching materials, it came together fine in the end. Let's just say it's a good thing this drapes over a machine and doesn't need to lay flat! Lessons learned.