These placemats started out as prototypes for the By the Fireside Pillow from Improvising Tradition. I don't know about you, but I'm just about at capacity for throw pillows around here (not that I'm promising to abstain from making more, mind you). Consequently, I was happy to re-purpose the tops into placemats. A simple trim down to 14 x 18, and they fit the bill beautifully.
I've quilted each placemat differently. Look how effective a simple all over square meander can be, even on a geometric design.
On the other I played up the geometric design by quilting the sections differently to make each stand out.
This pair of placemats brings my total number of placemats for Meals on Wheels to 10 which is halfway to my goal of 20 by December. If you want to join me, add #placemats4mow to your social media posts to share.
Tuesday, June 26, 2018
Saturday, June 16, 2018
Handmade Travel Tags, Free Tutorial
I made a set of travel tags for family, and some friends requested a tutorial. It's been a while since I wrote and offered a free tutorial on the blog, so here it is as a big thank you for stopping by and leaving such kind comments over the years. These beautiful travel tags not only serve to mark your luggage should it become lost, they also make your bag easier to spot. Set your ubiquitous black rolling bag apart from the rest in the luggage return this summer. I'd love to see what you make, as always. Drop me an email or hashtag your work online with #handmadetraveltags
You may notice the June Tailor Quilter's Cut'n Press
in the background of many of the photos. It is a cutting mat on one side and a pressing surface on the other other. It's the perfect tool for a small project like this when you don't want to get up and down to use an ironing board because it fits right next to your machine.
Fat quarter or scraps of outside fabric
Interfacing scraps
Thread matching the outside fabric
Permanent pen
(1) 3 x 9 1/2 rectangle
(1) 2 x 3 rectangle
(1) 2 1/4 x 14 strip
From the white fabric, cut
(1) 3 x 8 rectangle
From the interfacing, cut
(2) 3 x 9 1/2 rectangles
1. Using a permanent pen, write the address on the white fabric,
on the right half of the rectangle, leaving at least 1/2 inch from the right
edge.
Tip: I type the address in a word processing program and trace the address onto the fabric directly from my computer screen.
2. Sew the 2 x 3 rectangle of outside fabric to the white fabric, near the address along the 3 inch edge, using a quarter inch seam allowance. Press seam open.
3. Following package instructions, apply the interfacing to the wrong side of the outside fabric rectangle and the white fabric unit.
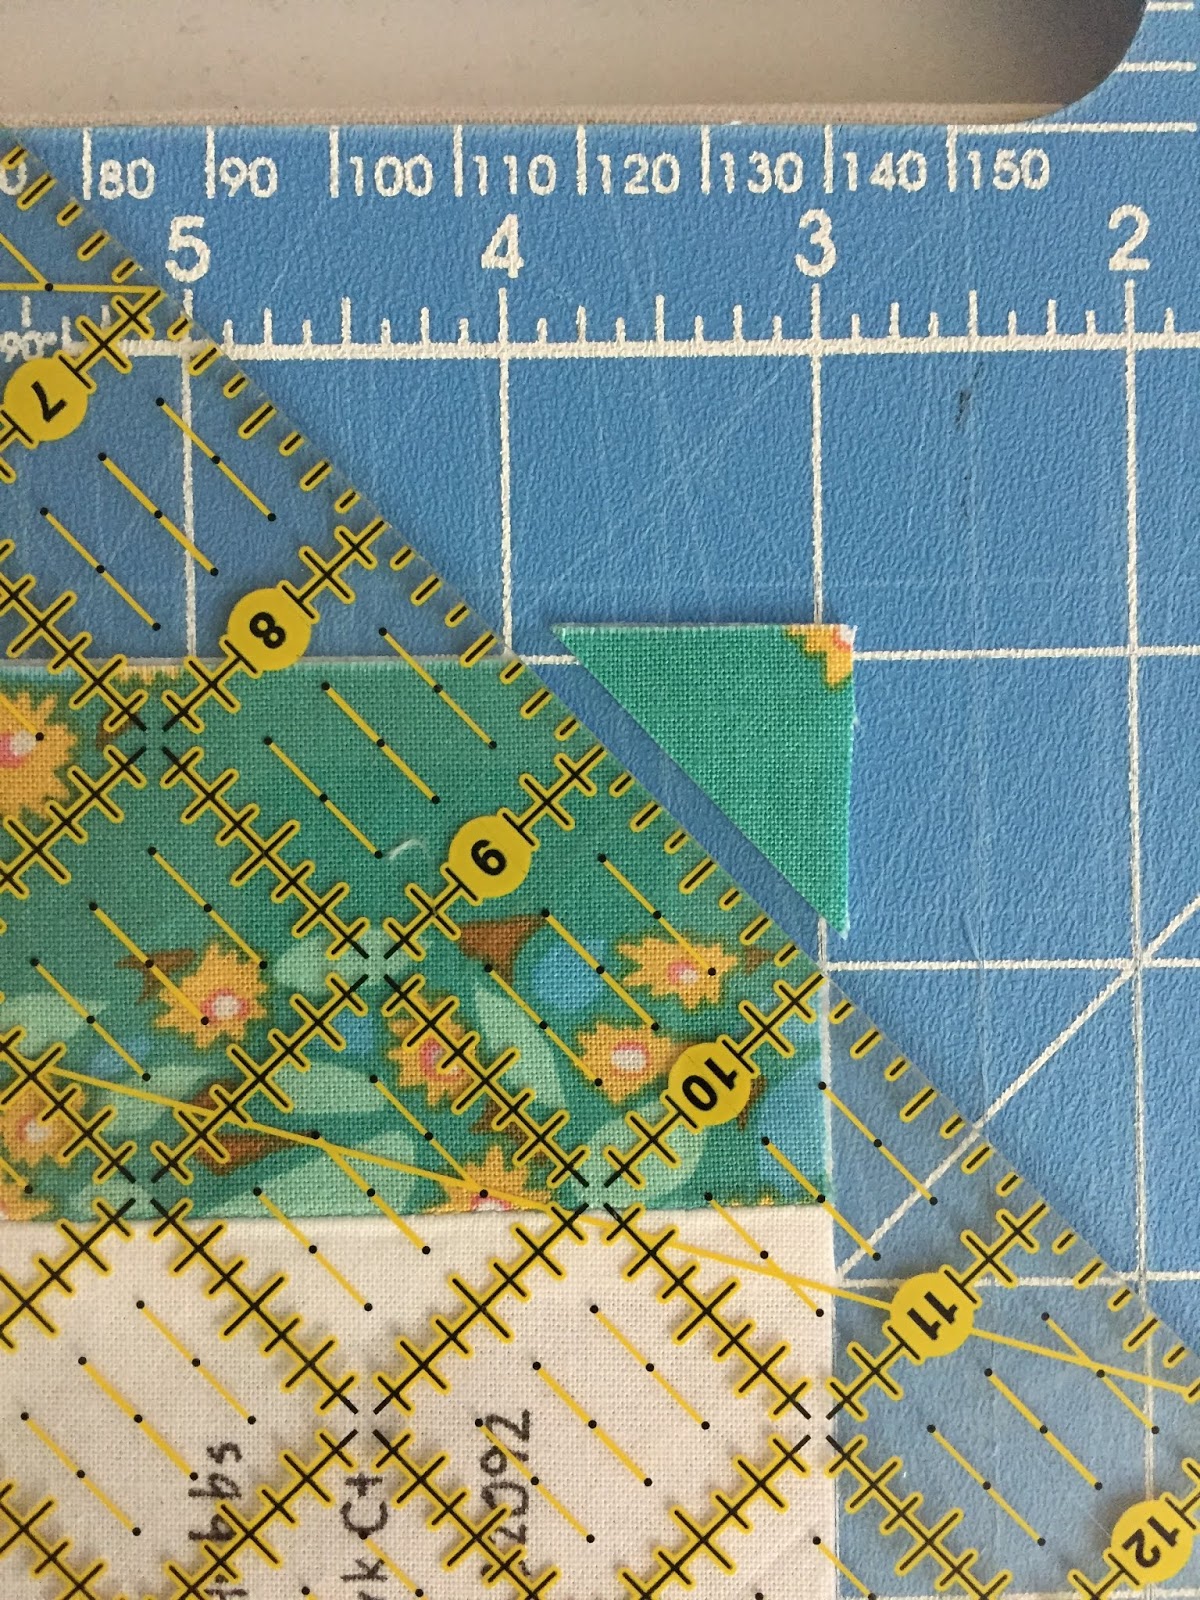
4. Trim one end of both rectangles to create the pointed end of the luggage tag. Following the inch markings on your cutting mat, place your ruler diagonally from one inch mark to another as shown in the photo, and trim off the triangle. Repeat with the other corner.
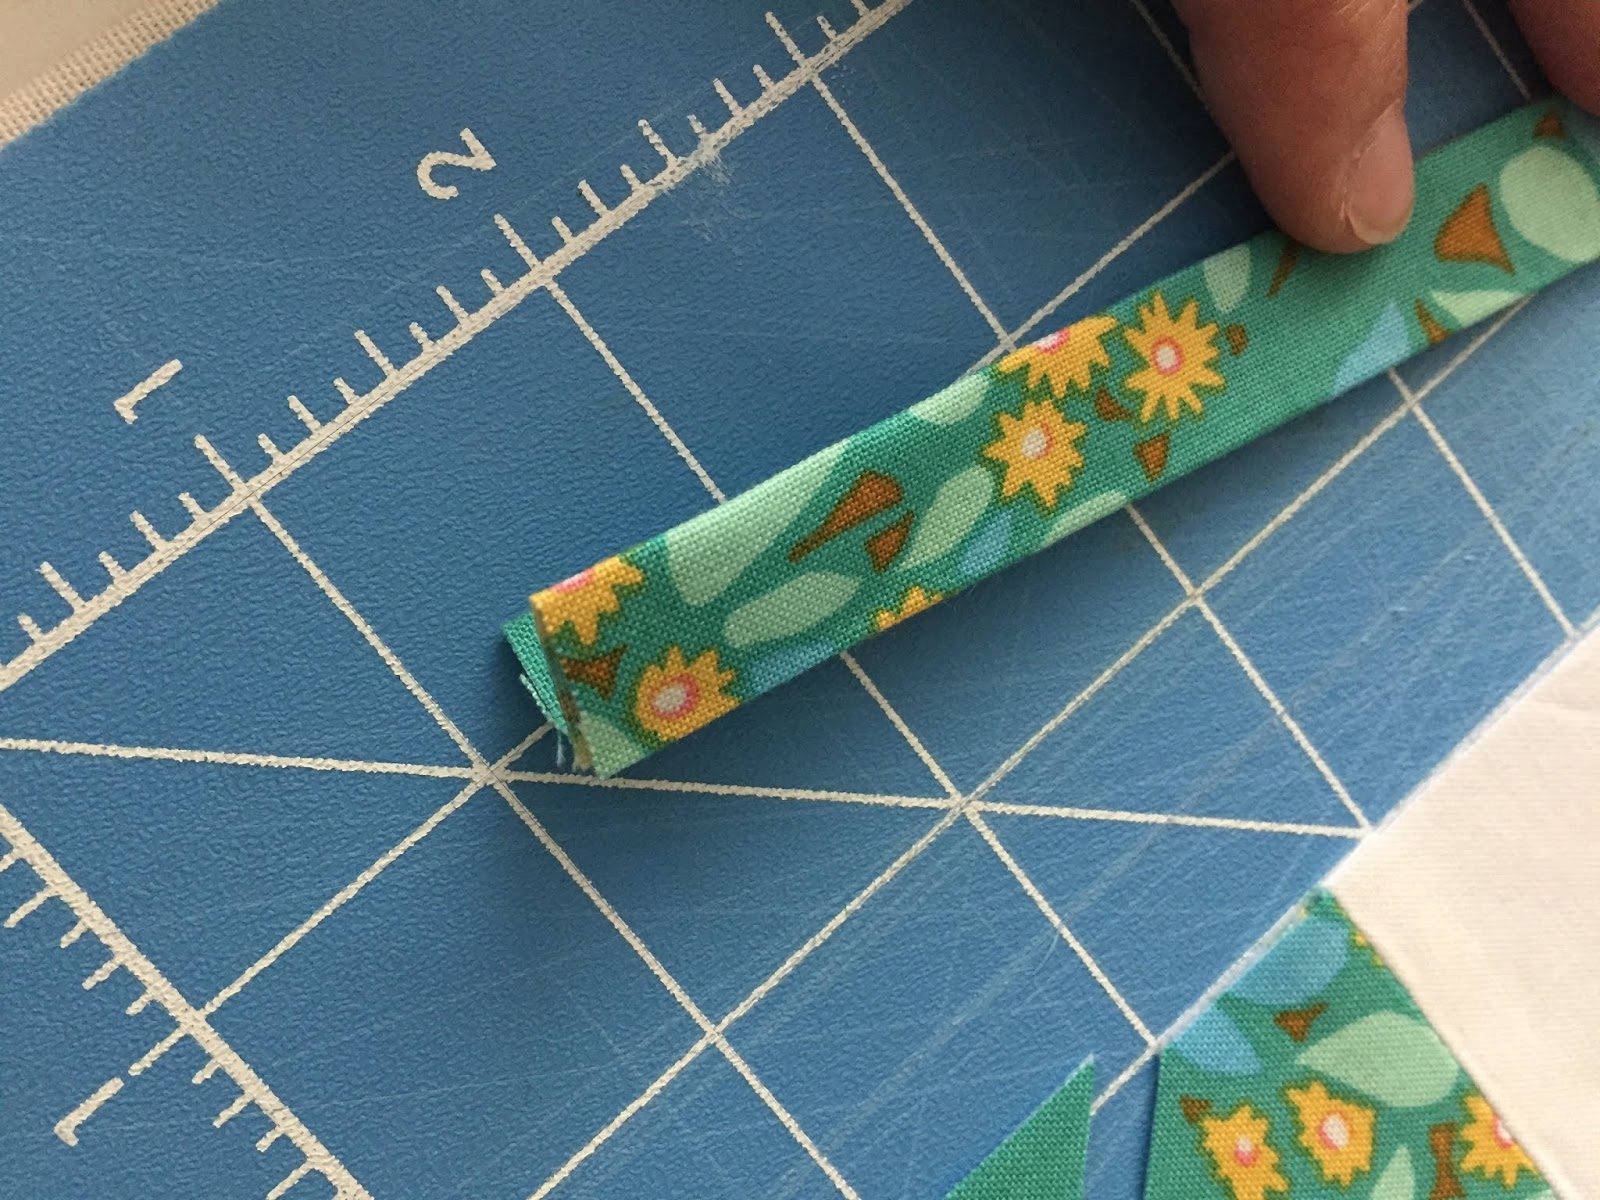
5. Fold the 2 1/4 x 14 rectangle in half lengthways and press. Open up the rectangle, and bring the outer edges to meet in the center. Press. Fold in half again, lengthways, to create a narrow strip, with the raw edges encased in the center.
6. Edge stitch along both long sides of the strip.
7. Bring the two raw edges of the strip together and temporarily pin in the center of the straight end of the 3 inch edge of the rectangle of outside fabric. Right sides facing, place the white fabric unit on top, matching the edges carefully. Remove the temporary pin and pin through the outside fabric, the strip, and the white unit.
8. Pin and sew around all the edges with a 1/4 inch seam, leaving about two inches for turning.
Tip: Be careful not to sew over the folded strip on the inside.
9. Turn right side out, and press.
10. Edge stitch around the outside edge.
11. Create a button hole in the center of the outside fabric at the pointed end of the tag. The button hole should be perpendicular to the address and be the same length as the width of your strip, a little over 1/2 inch.
12. Fold the tag in half, overlapping the outside fabrics slightly to hide the inner white fabric but not folding over the address inside. Press.
13. Edgestitch along the fold.
14. Push the strip through the button hole, and your handmade travel tag is complete.
You may notice the June Tailor Quilter's Cut'n Press
Handmade Travel Tag
Tutorial by Alexandra LedgerwoodMaterials
Scrap of white fabric 3 x 9 1/2 or largerFat quarter or scraps of outside fabric
Interfacing scraps
Thread matching the outside fabric
Permanent pen
Cutting instructions
From the outside fabric, cut(1) 3 x 9 1/2 rectangle
(1) 2 x 3 rectangle
(1) 2 1/4 x 14 strip
(1) 3 x 8 rectangle
(2) 3 x 9 1/2 rectangles
Sewing instructions
1. Using a permanent pen, write the address on the white fabric,
on the right half of the rectangle, leaving at least 1/2 inch from the right
edge.Tip: I type the address in a word processing program and trace the address onto the fabric directly from my computer screen.
2. Sew the 2 x 3 rectangle of outside fabric to the white fabric, near the address along the 3 inch edge, using a quarter inch seam allowance. Press seam open.
3. Following package instructions, apply the interfacing to the wrong side of the outside fabric rectangle and the white fabric unit.
4. Trim one end of both rectangles to create the pointed end of the luggage tag. Following the inch markings on your cutting mat, place your ruler diagonally from one inch mark to another as shown in the photo, and trim off the triangle. Repeat with the other corner.
5. Fold the 2 1/4 x 14 rectangle in half lengthways and press. Open up the rectangle, and bring the outer edges to meet in the center. Press. Fold in half again, lengthways, to create a narrow strip, with the raw edges encased in the center.
6. Edge stitch along both long sides of the strip.
7. Bring the two raw edges of the strip together and temporarily pin in the center of the straight end of the 3 inch edge of the rectangle of outside fabric. Right sides facing, place the white fabric unit on top, matching the edges carefully. Remove the temporary pin and pin through the outside fabric, the strip, and the white unit.
8. Pin and sew around all the edges with a 1/4 inch seam, leaving about two inches for turning.
Tip: Be careful not to sew over the folded strip on the inside.
9. Turn right side out, and press.
10. Edge stitch around the outside edge.
11. Create a button hole in the center of the outside fabric at the pointed end of the tag. The button hole should be perpendicular to the address and be the same length as the width of your strip, a little over 1/2 inch.
12. Fold the tag in half, overlapping the outside fabrics slightly to hide the inner white fabric but not folding over the address inside. Press.
13. Edgestitch along the fold.
14. Push the strip through the button hole, and your handmade travel tag is complete.
Wednesday, May 16, 2018
Free Motion Quilting on Essex
There are few things as therapeutic and fun as free motion quilting on whole cloth. I've played with fmq on Essex linen before to create this set of placemats. The recipient requested another four, so I got to try out four new designs and pick out another four lovely Kona solids to bind the placemats.
I used 40 weight Aurifil for the quilting, and I'm really happy with the results. The texture of this fabric combined with quilting is irresistible. I only wish I had time to make more.
Labels:
essex,
fmq,
free motion quilting,
kona,
place mats,
placemats,
solids
Monday, May 7, 2018
Rugby Stripe Baby Quilt
The blues, greens, and blacks make this version more masculine than the first, larger iteration of the quilt. I love how fabric choice completely changes the look and feel of a quilt.
I quilted it simply with my Bernina's serpentine stitch. You can play with the width of the wave and the stitch length and use the side of the walking foot to gauge distance between rows of stitching. These are about an inch apart.
The binding is a crisp navy and white stripe that should fit the nautical theme of my friend's nursery, and the flannel back will make this quilt a cozy on for her new little boy. At 41 x 55 it is a nice size to serve him through his preschool years too.
Saturday, April 28, 2018
More Improv Quilted Placemats
I finished up another couple of improv quilted placemats for my charity project for the year which is placemats for Meals on Wheels (#placemats4mow if you want to join in) made using up leftover blocks and scraps.
This was originally a test panel of strata for Improvising Tradition (affiliate link, although it looks like you can buy a signed copy from me in my etsy shop cheaper than that at the moment).This panel taught me that I prefer strata that is more monochromatic, but I chose to celebrate the pops of green as is by binding in a leftover strip of Kona grass green binding. The perfect backing presented itself as an old Denyse Schmidt print. Love those dots.
I had fun coming up with a different quilting design for each shape, although some worked out better than others and some got repeated.
I made several strips of the improv technique in the second placemat a while ago. Several of the strips became a pillow, but I had a spare strip I've been looking to use. Bingo!
These placemats are numbers seven and eight, so it looks like I'm on track to make my goal of twenty to donate by December.
This was originally a test panel of strata for Improvising Tradition (affiliate link, although it looks like you can buy a signed copy from me in my etsy shop cheaper than that at the moment).This panel taught me that I prefer strata that is more monochromatic, but I chose to celebrate the pops of green as is by binding in a leftover strip of Kona grass green binding. The perfect backing presented itself as an old Denyse Schmidt print. Love those dots.
I had fun coming up with a different quilting design for each shape, although some worked out better than others and some got repeated.
I made several strips of the improv technique in the second placemat a while ago. Several of the strips became a pillow, but I had a spare strip I've been looking to use. Bingo!
These placemats are numbers seven and eight, so it looks like I'm on track to make my goal of twenty to donate by December.
Sunday, April 22, 2018
Improv Quilted Placemats
These modern, quilted placemats made good use of some leftover improv panels and scraps of grey solids. They are placemats numbers five and six for my year long project to make placemats for Meals on Wheels.
Placemats are a great way to try out new quilting designs. They are so quick to make too. I went a little crazy with free motion designs on one, and on the other I stuck to my walking foot to create dense waves.
I'd love to have you join me in putting your random quilt blocks of scraps to use to make something beautiful and useful for a homebound senior. Tag your photos online #placemats4mow to share your work. You can donate your placemats to your local chapter or any other charity of your choice. I put a little extra love in each placemat by hand stitching the binding.
Placemats are a great way to try out new quilting designs. They are so quick to make too. I went a little crazy with free motion designs on one, and on the other I stuck to my walking foot to create dense waves.
I'd love to have you join me in putting your random quilt blocks of scraps to use to make something beautiful and useful for a homebound senior. Tag your photos online #placemats4mow to share your work. You can donate your placemats to your local chapter or any other charity of your choice. I put a little extra love in each placemat by hand stitching the binding.
Thursday, April 5, 2018
Scrappy Triangle Quilt
It seems fitting to finish this quilt in time for spring. (Well, technically it is spring, although we're expecting a bit of snow tomorrow.) The bright colors of the Anna Maria Horner fabrics are undeniably cheerful and full of life, just like the season, and the low volume prints set them off nicely.
I used 50 weight white, Aurifil thread to quilt the top in a free motion figure eight design, which I recommend if you are new to free motion quilting or have a largish quilt to handle on a home machine. The design offers lots of places to stop and adjust your quilt without interrupting the flow of the shapes. It can also be modified to fill pieced shapes, like these triangles.The binding is another Anna Maria Horner favorite, and the backing is a soft, white flannel.
I'm sending the quilt to my grandmother. It will drape over the back of her couch where she will see it everyday. At 54 x 71 it is also a good size to fold over her lap on chilly days. She may not remember that I made it for her, but I'll feel better knowing it's there with her although I can't be.
Subscribe to:
Posts (Atom)