You may notice the June Tailor Quilter's Cut'n Press
Handmade Travel Tag
Tutorial by Alexandra LedgerwoodMaterials
Scrap of white fabric 3 x 9 1/2 or largerFat quarter or scraps of outside fabric
Interfacing scraps
Thread matching the outside fabric
Permanent pen
Cutting instructions
From the outside fabric, cut(1) 3 x 9 1/2 rectangle
(1) 2 x 3 rectangle
(1) 2 1/4 x 14 strip
(1) 3 x 8 rectangle
(2) 3 x 9 1/2 rectangles
Sewing instructions
1. Using a permanent pen, write the address on the white fabric,
on the right half of the rectangle, leaving at least 1/2 inch from the right
edge.Tip: I type the address in a word processing program and trace the address onto the fabric directly from my computer screen.
2. Sew the 2 x 3 rectangle of outside fabric to the white fabric, near the address along the 3 inch edge, using a quarter inch seam allowance. Press seam open.
3. Following package instructions, apply the interfacing to the wrong side of the outside fabric rectangle and the white fabric unit.
4. Trim one end of both rectangles to create the pointed end of the luggage tag. Following the inch markings on your cutting mat, place your ruler diagonally from one inch mark to another as shown in the photo, and trim off the triangle. Repeat with the other corner.
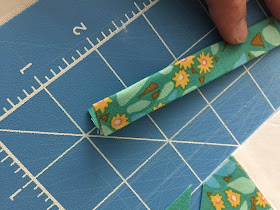
5. Fold the 2 1/4 x 14 rectangle in half lengthways and press. Open up the rectangle, and bring the outer edges to meet in the center. Press. Fold in half again, lengthways, to create a narrow strip, with the raw edges encased in the center.
6. Edge stitch along both long sides of the strip.
7. Bring the two raw edges of the strip together and temporarily pin in the center of the straight end of the 3 inch edge of the rectangle of outside fabric. Right sides facing, place the white fabric unit on top, matching the edges carefully. Remove the temporary pin and pin through the outside fabric, the strip, and the white unit.
8. Pin and sew around all the edges with a 1/4 inch seam, leaving about two inches for turning.
Tip: Be careful not to sew over the folded strip on the inside.
9. Turn right side out, and press.
10. Edge stitch around the outside edge.
11. Create a button hole in the center of the outside fabric at the pointed end of the tag. The button hole should be perpendicular to the address and be the same length as the width of your strip, a little over 1/2 inch.
12. Fold the tag in half, overlapping the outside fabrics slightly to hide the inner white fabric but not folding over the address inside. Press.
13. Edgestitch along the fold.
14. Push the strip through the button hole, and your handmade travel tag is complete.


Like it! Can’t wait to try! Thinking an embroidered monogram would be pretty on outside. Thanks Alex!
ReplyDeleteLove the idea of monogramming!
ReplyDeleteThanks for this! I have a couple of hand-made luggage tags, but need more! I find them sturdy and definitely help in luggage-identification after a flight.
ReplyDeleteYou’re so welcome. I hope it’s useful!
DeleteThanks so much for this tutorial! I always wonder if I'm grabbing the right piece of dark luggage and end up taking a peek inside to make sure it's mine :) Just what I need for a trip this September.
ReplyDeletePerfect! Yes, and you can make them brightly colored or even scrappy to really catch your eye on the luggage carousel.
DeleteLove this! Thanks!
ReplyDeleteI made a bunch of these as stocking stuffers last year. Everyone loved them! I like that the personal information stays covered up to the casual observer.
ReplyDeleteAre you looking for Customised Paper bags in UK, Due to our custom bags’ efficiency and effectiveness. Client always come back to us. Call us Now 07360238910
ReplyDelete